RM2PT Tutorial
Requirements Modeling in 4 steps
After creating a RM2PT project by following the previous tutorial, we can create a requirements model from scratch.
A requirements model contains a use case model and a domain model
- Step 1 to 3 focuses on specifying use case model
- Step 4 focuses on domain modeling
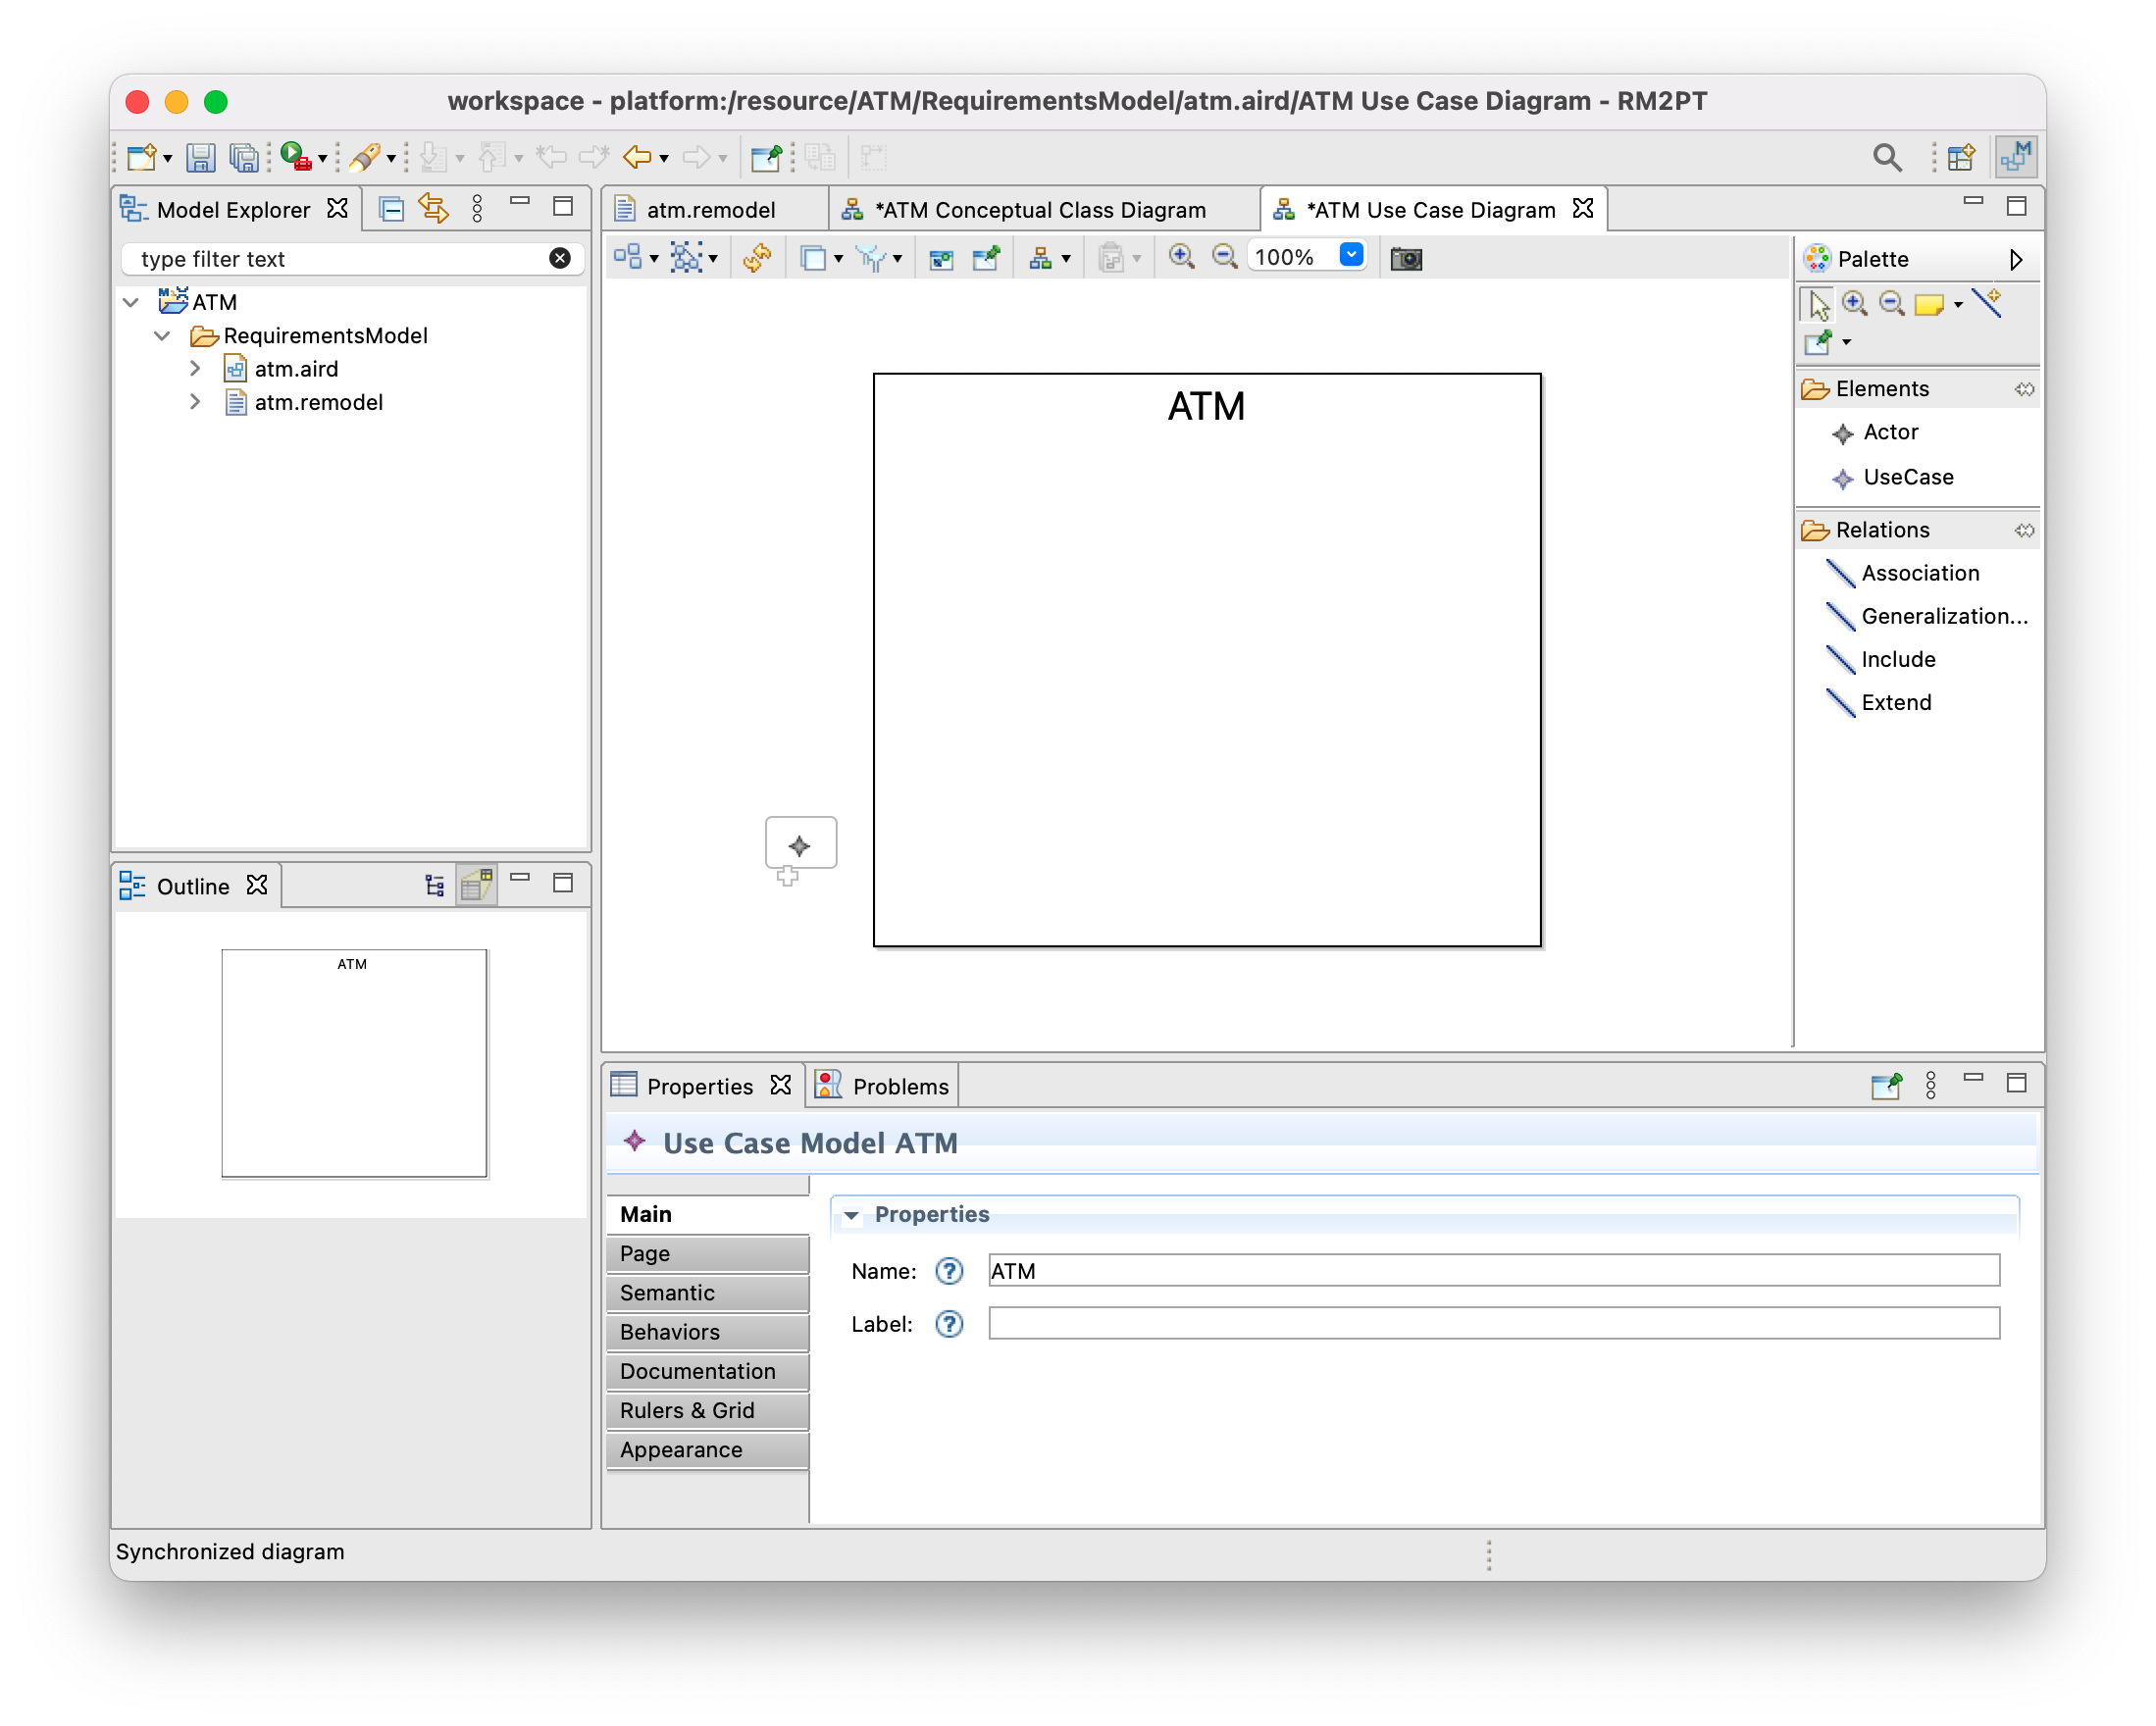
Step 1 : Use Case Diagram
By default, the use case diagram of your target system is opened, draw and drog the system boundary as follows:
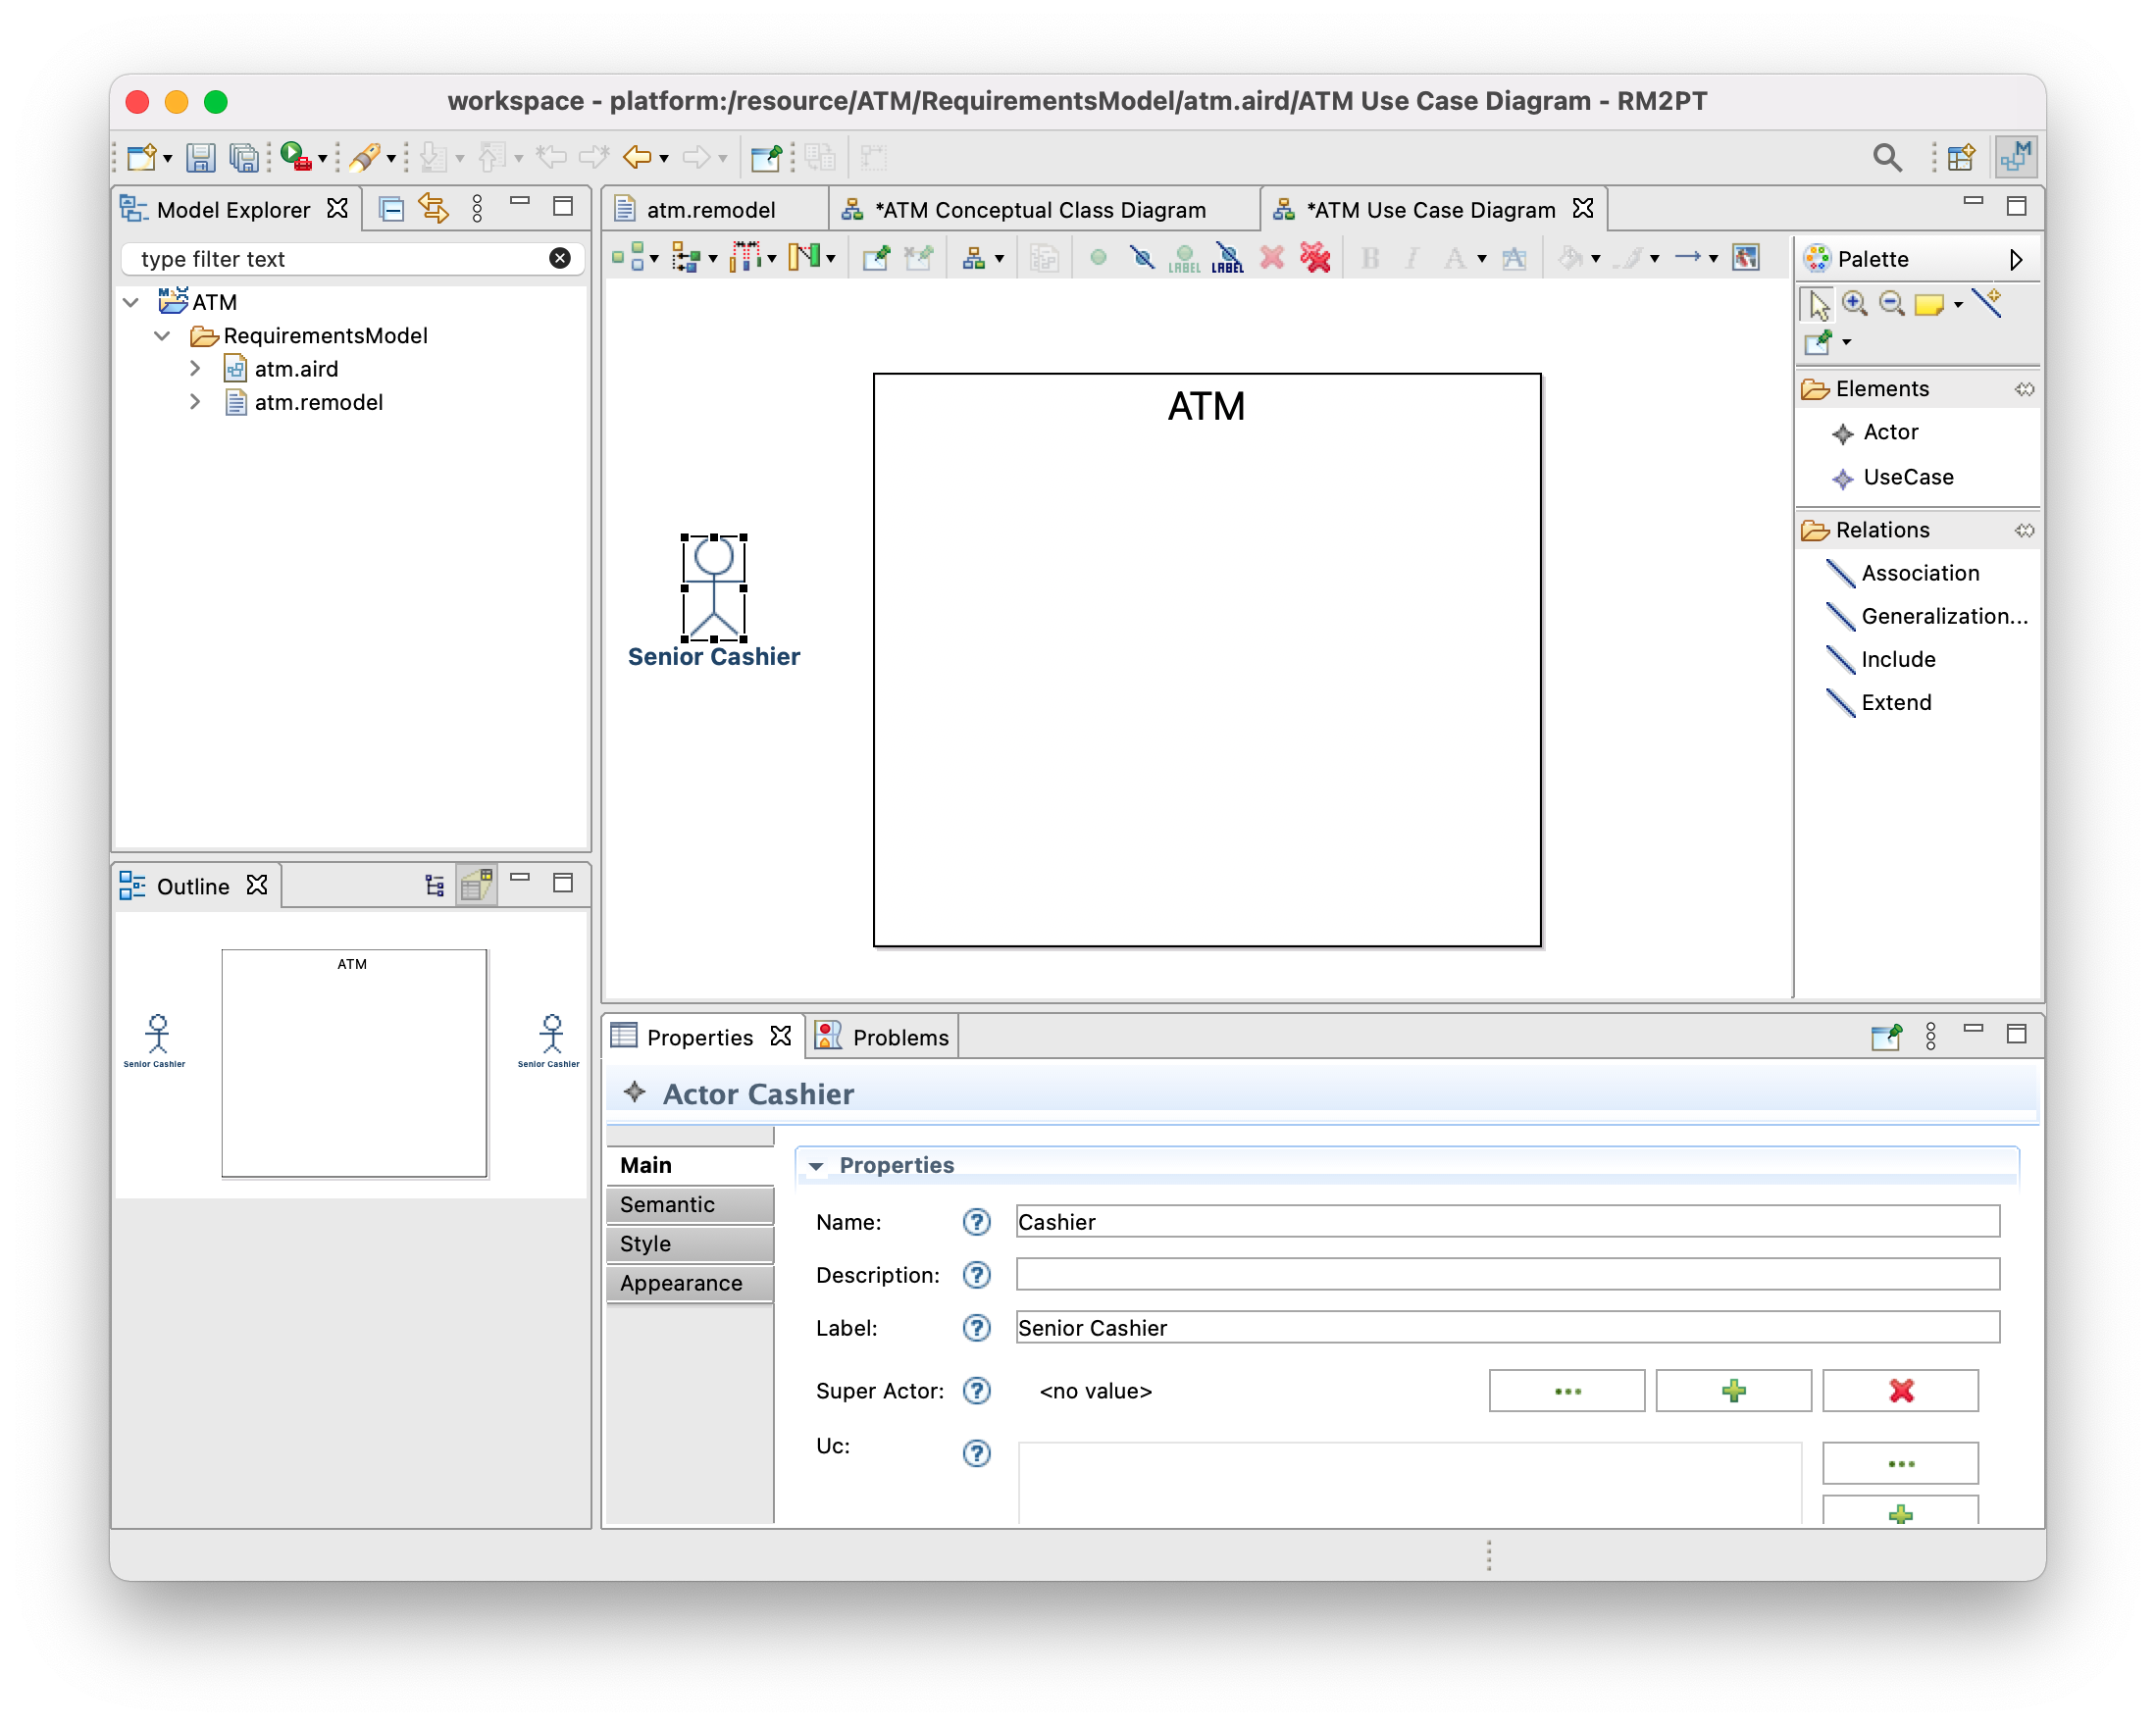
Use the Pattle on the right side to create your first Actor Cashier

if you want to make a alisa to this Cashier, enter Alisa name in Label properties E.g., Senior Cashier, the actor will show the alias on the use case diagram as follows:
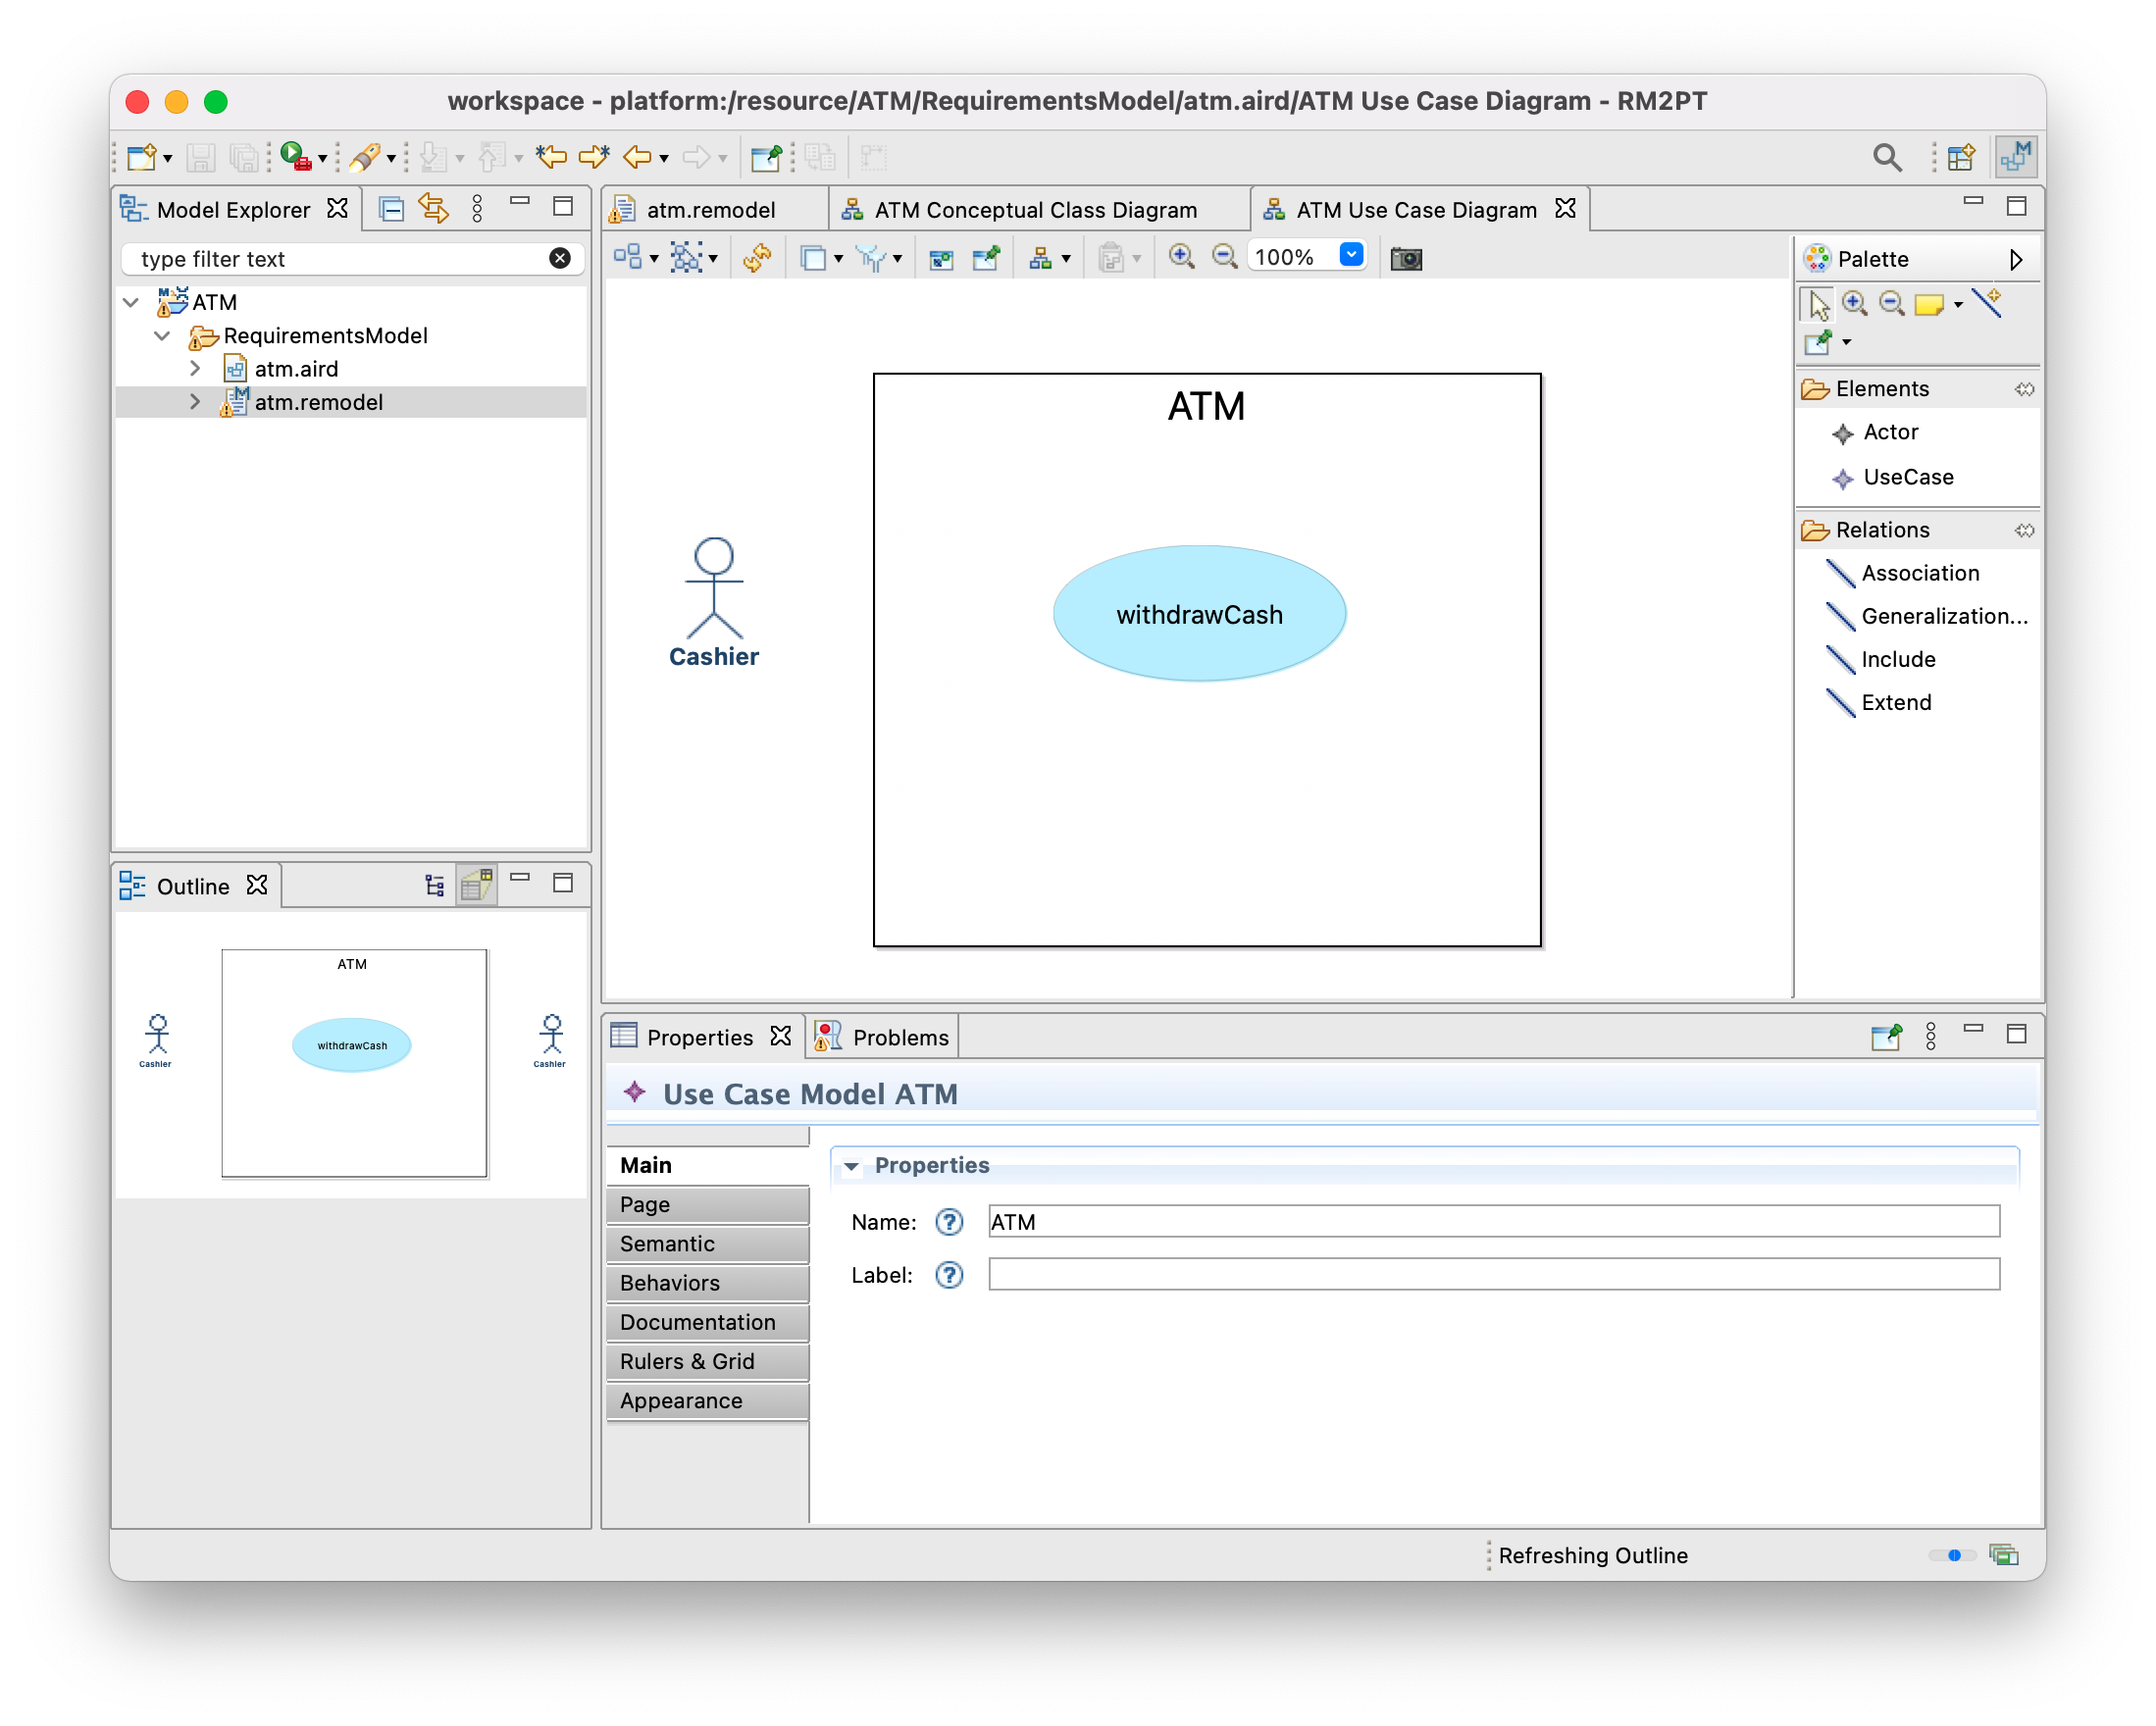
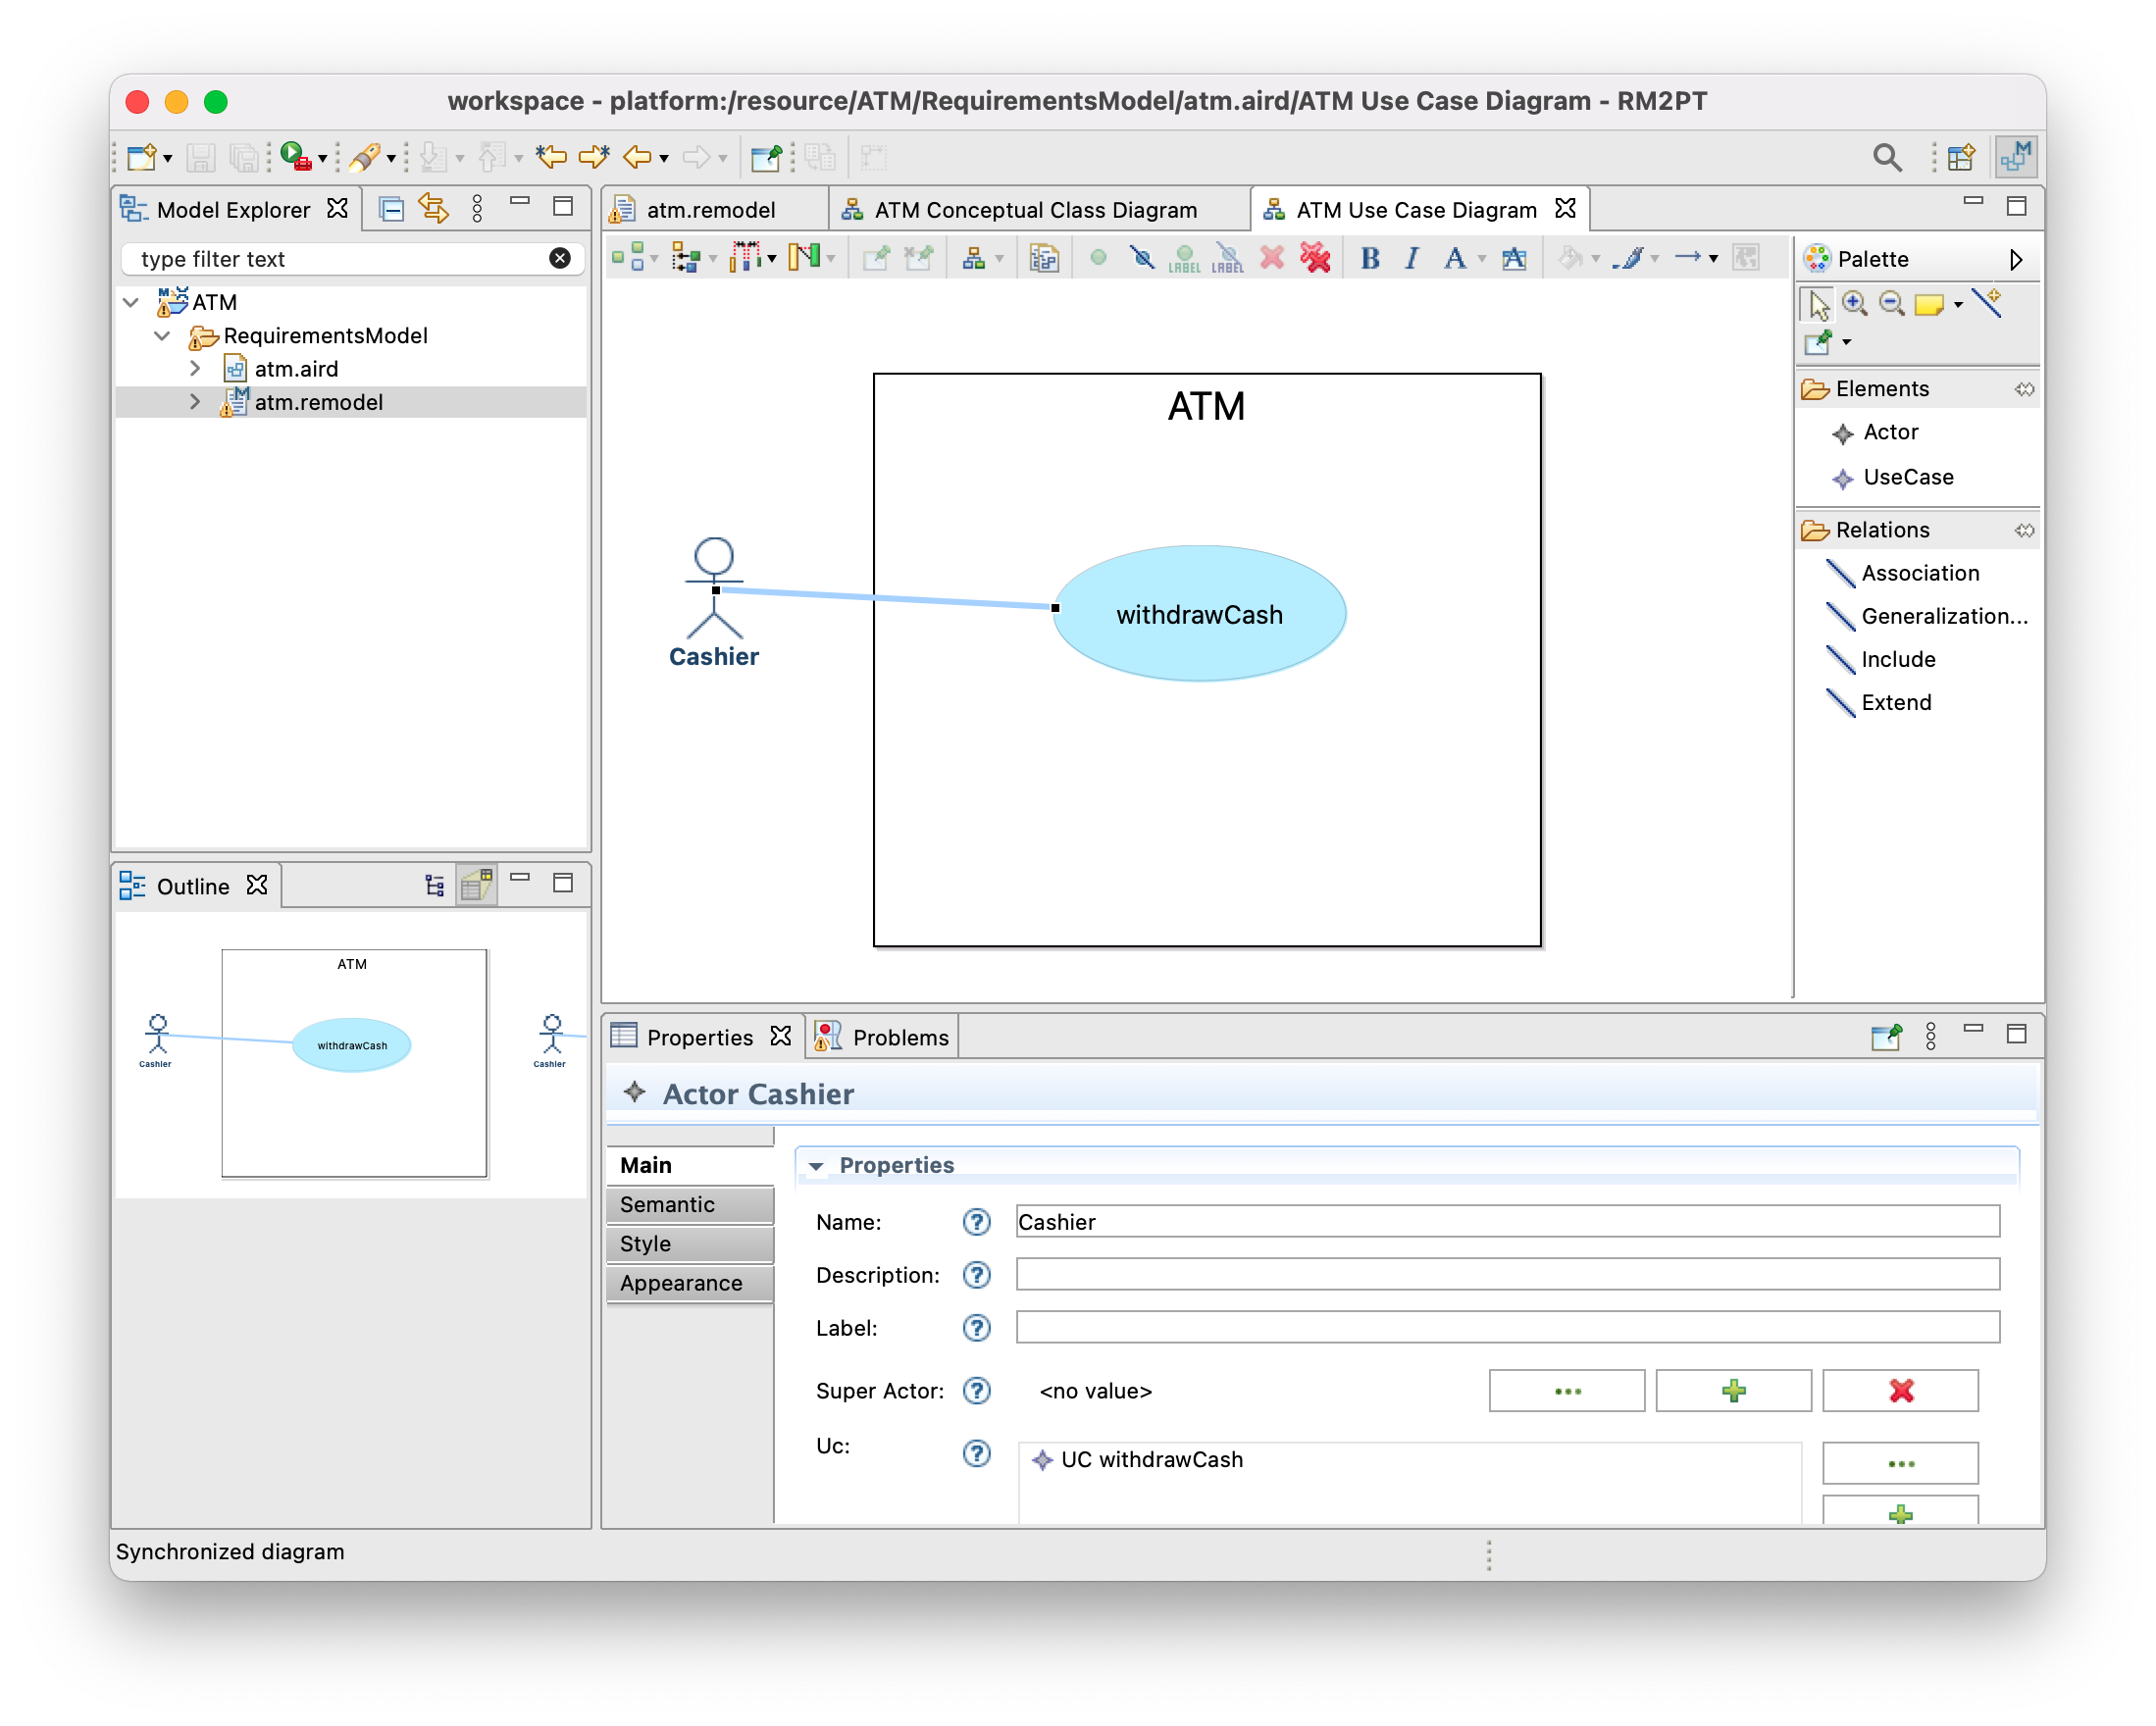
Then, let’s create the first UseCase withdrawCash and create an Assoication between Cashier and withdrawCash
Step 2 : System Sequence Diagram for Use Case
Now, let’s create a system sequence diagram for the use case withdrawCash by double clicking the use case icon, the wizard will be opened, then create OK , then a system sequence diagram withdrawCashSSD and a service interface withdrawCashService
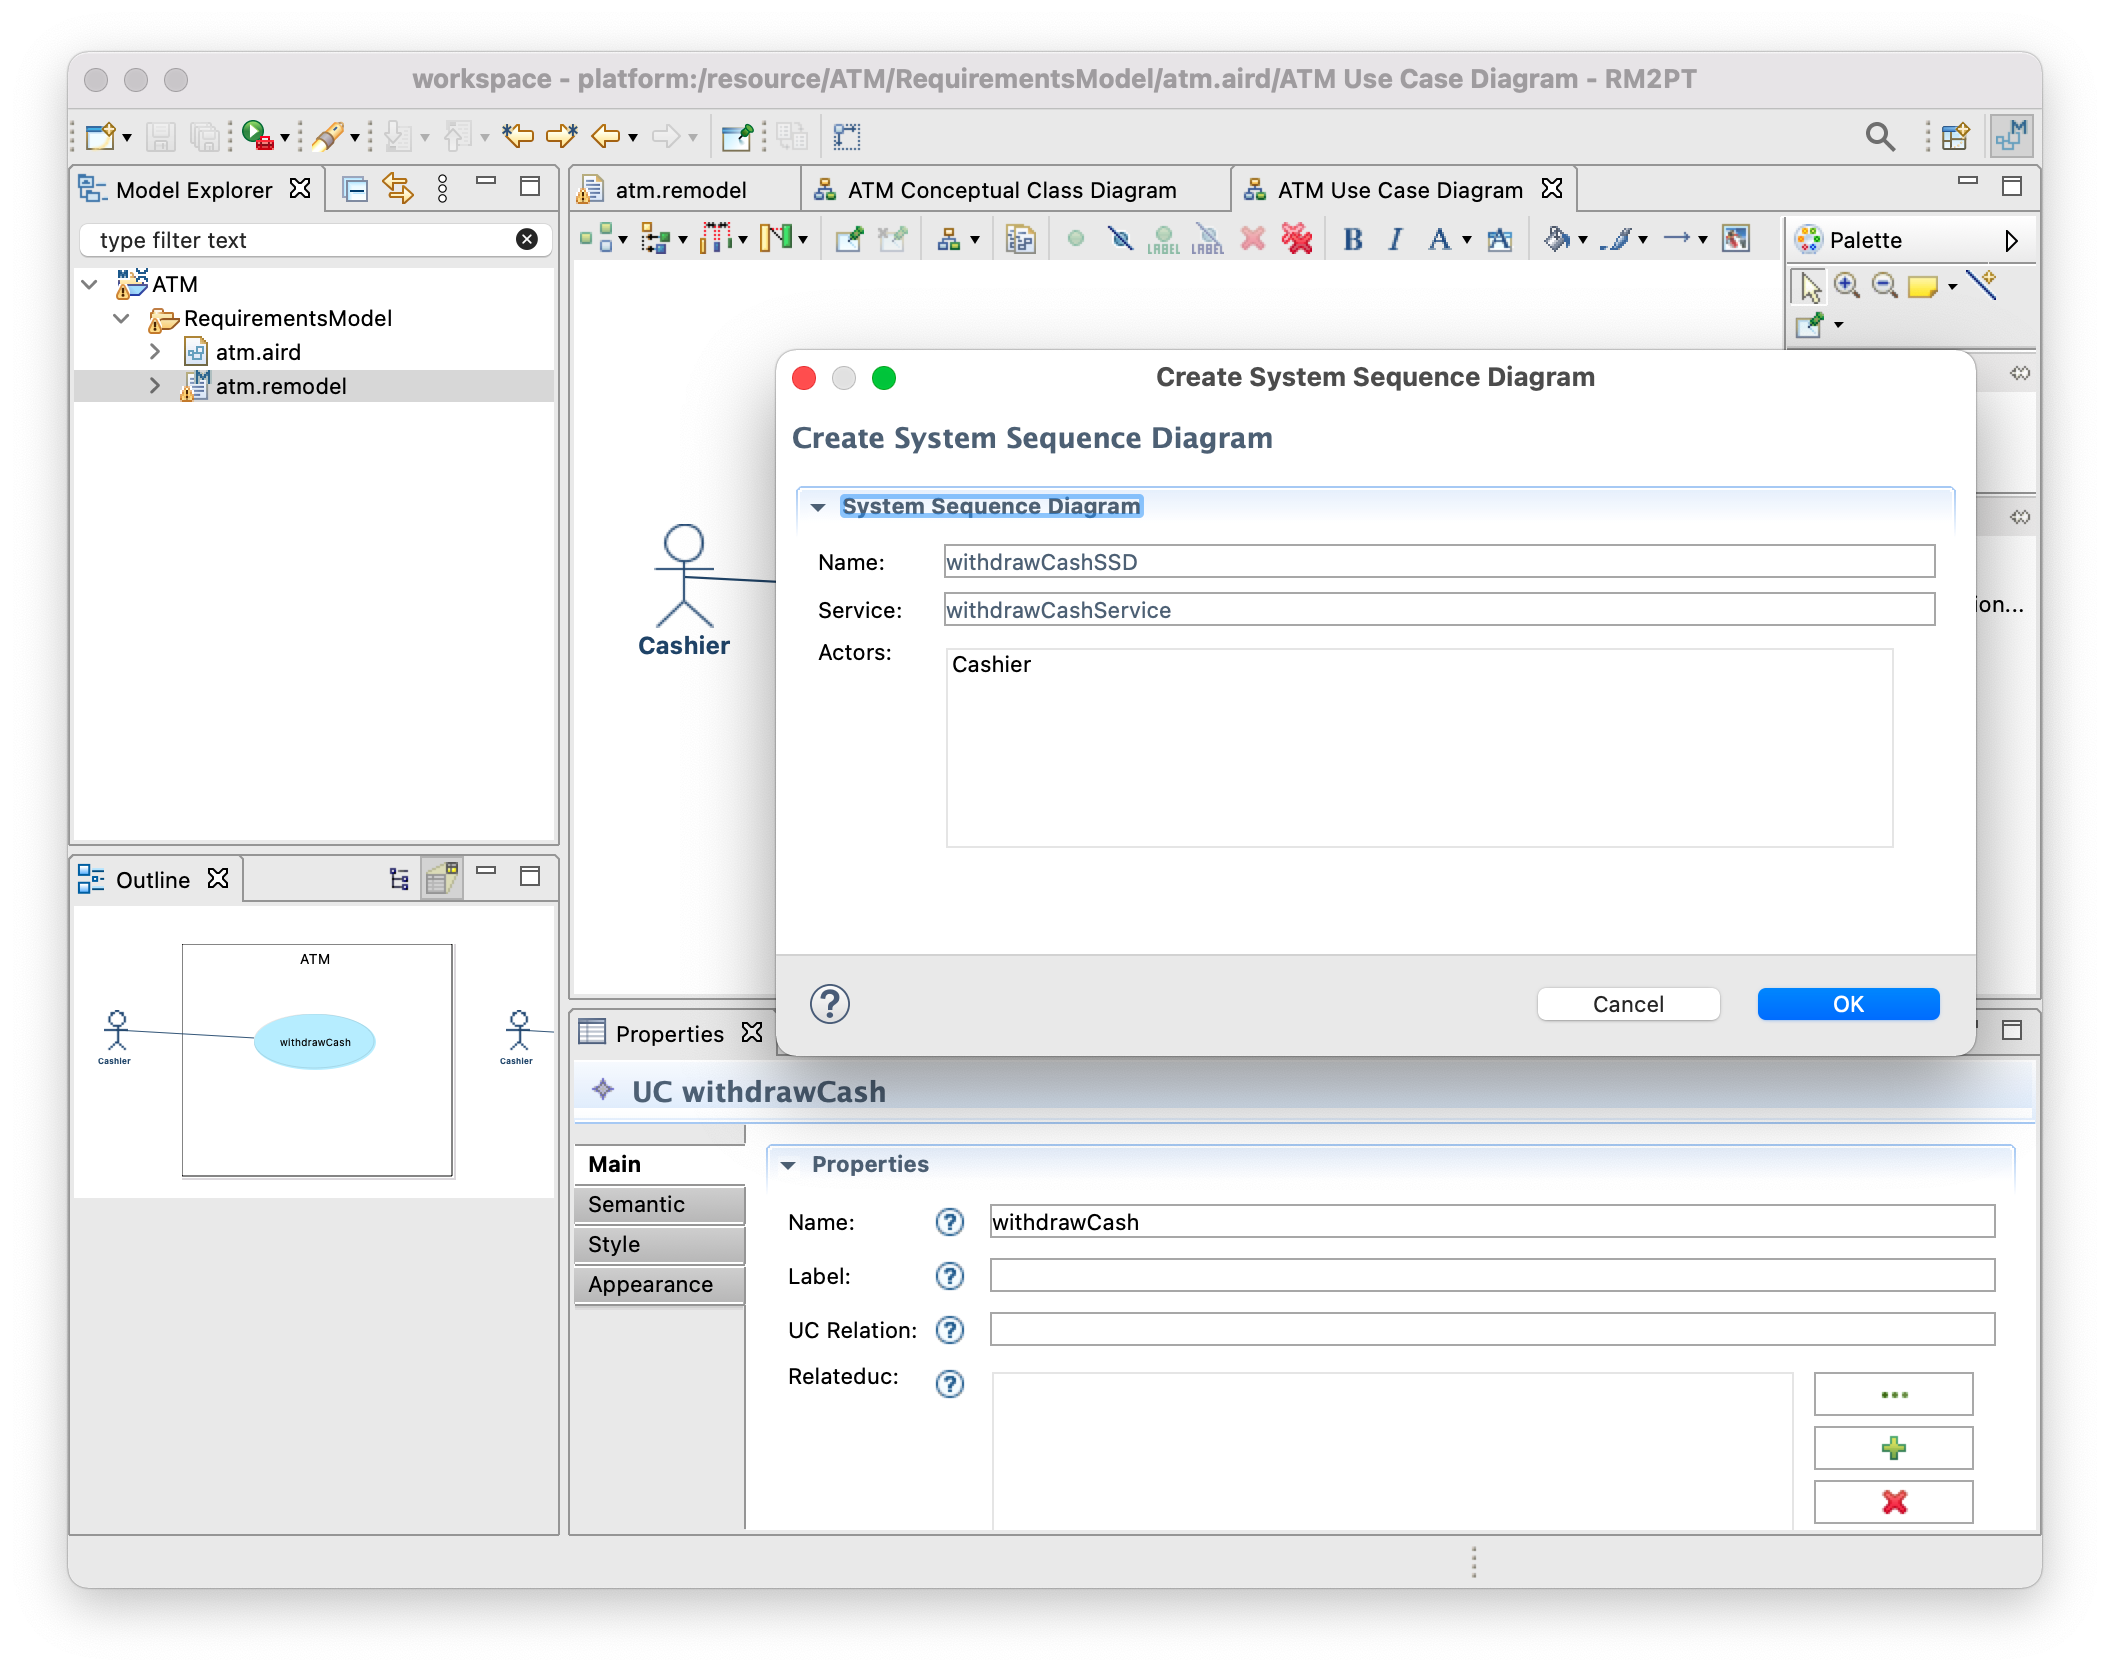
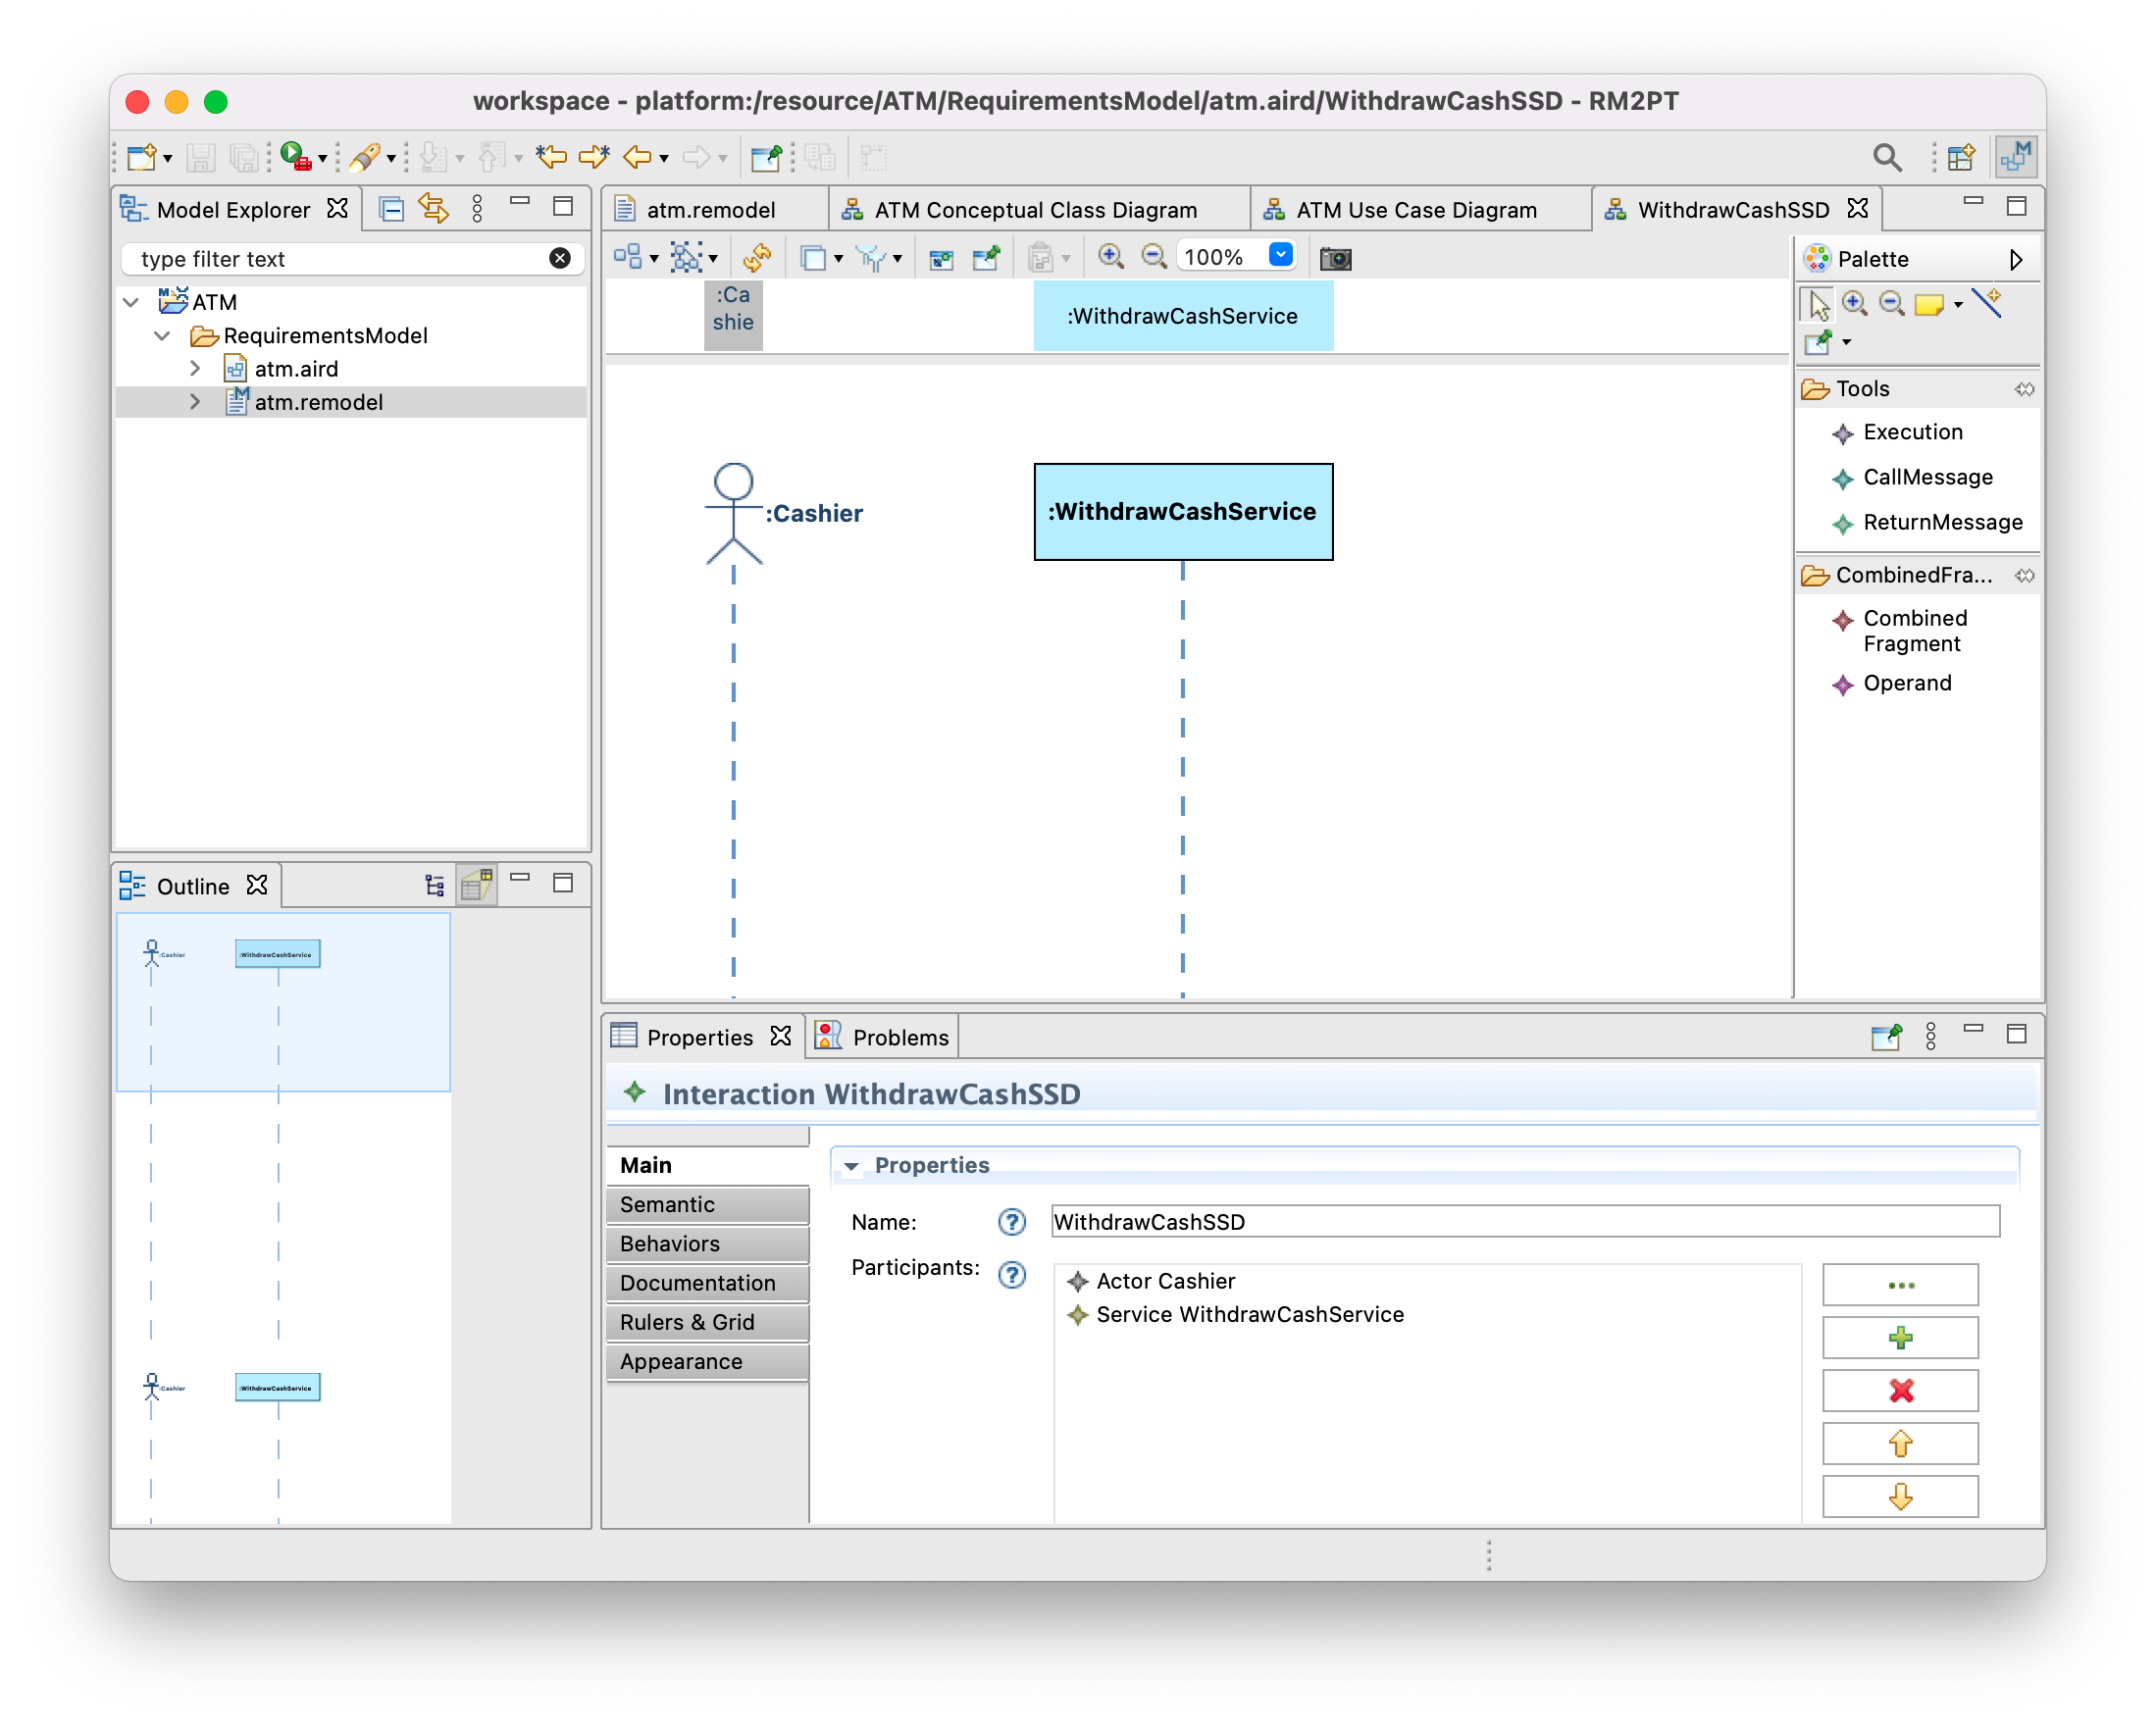
RM2PT will navigate the system sequence diagram as follows:
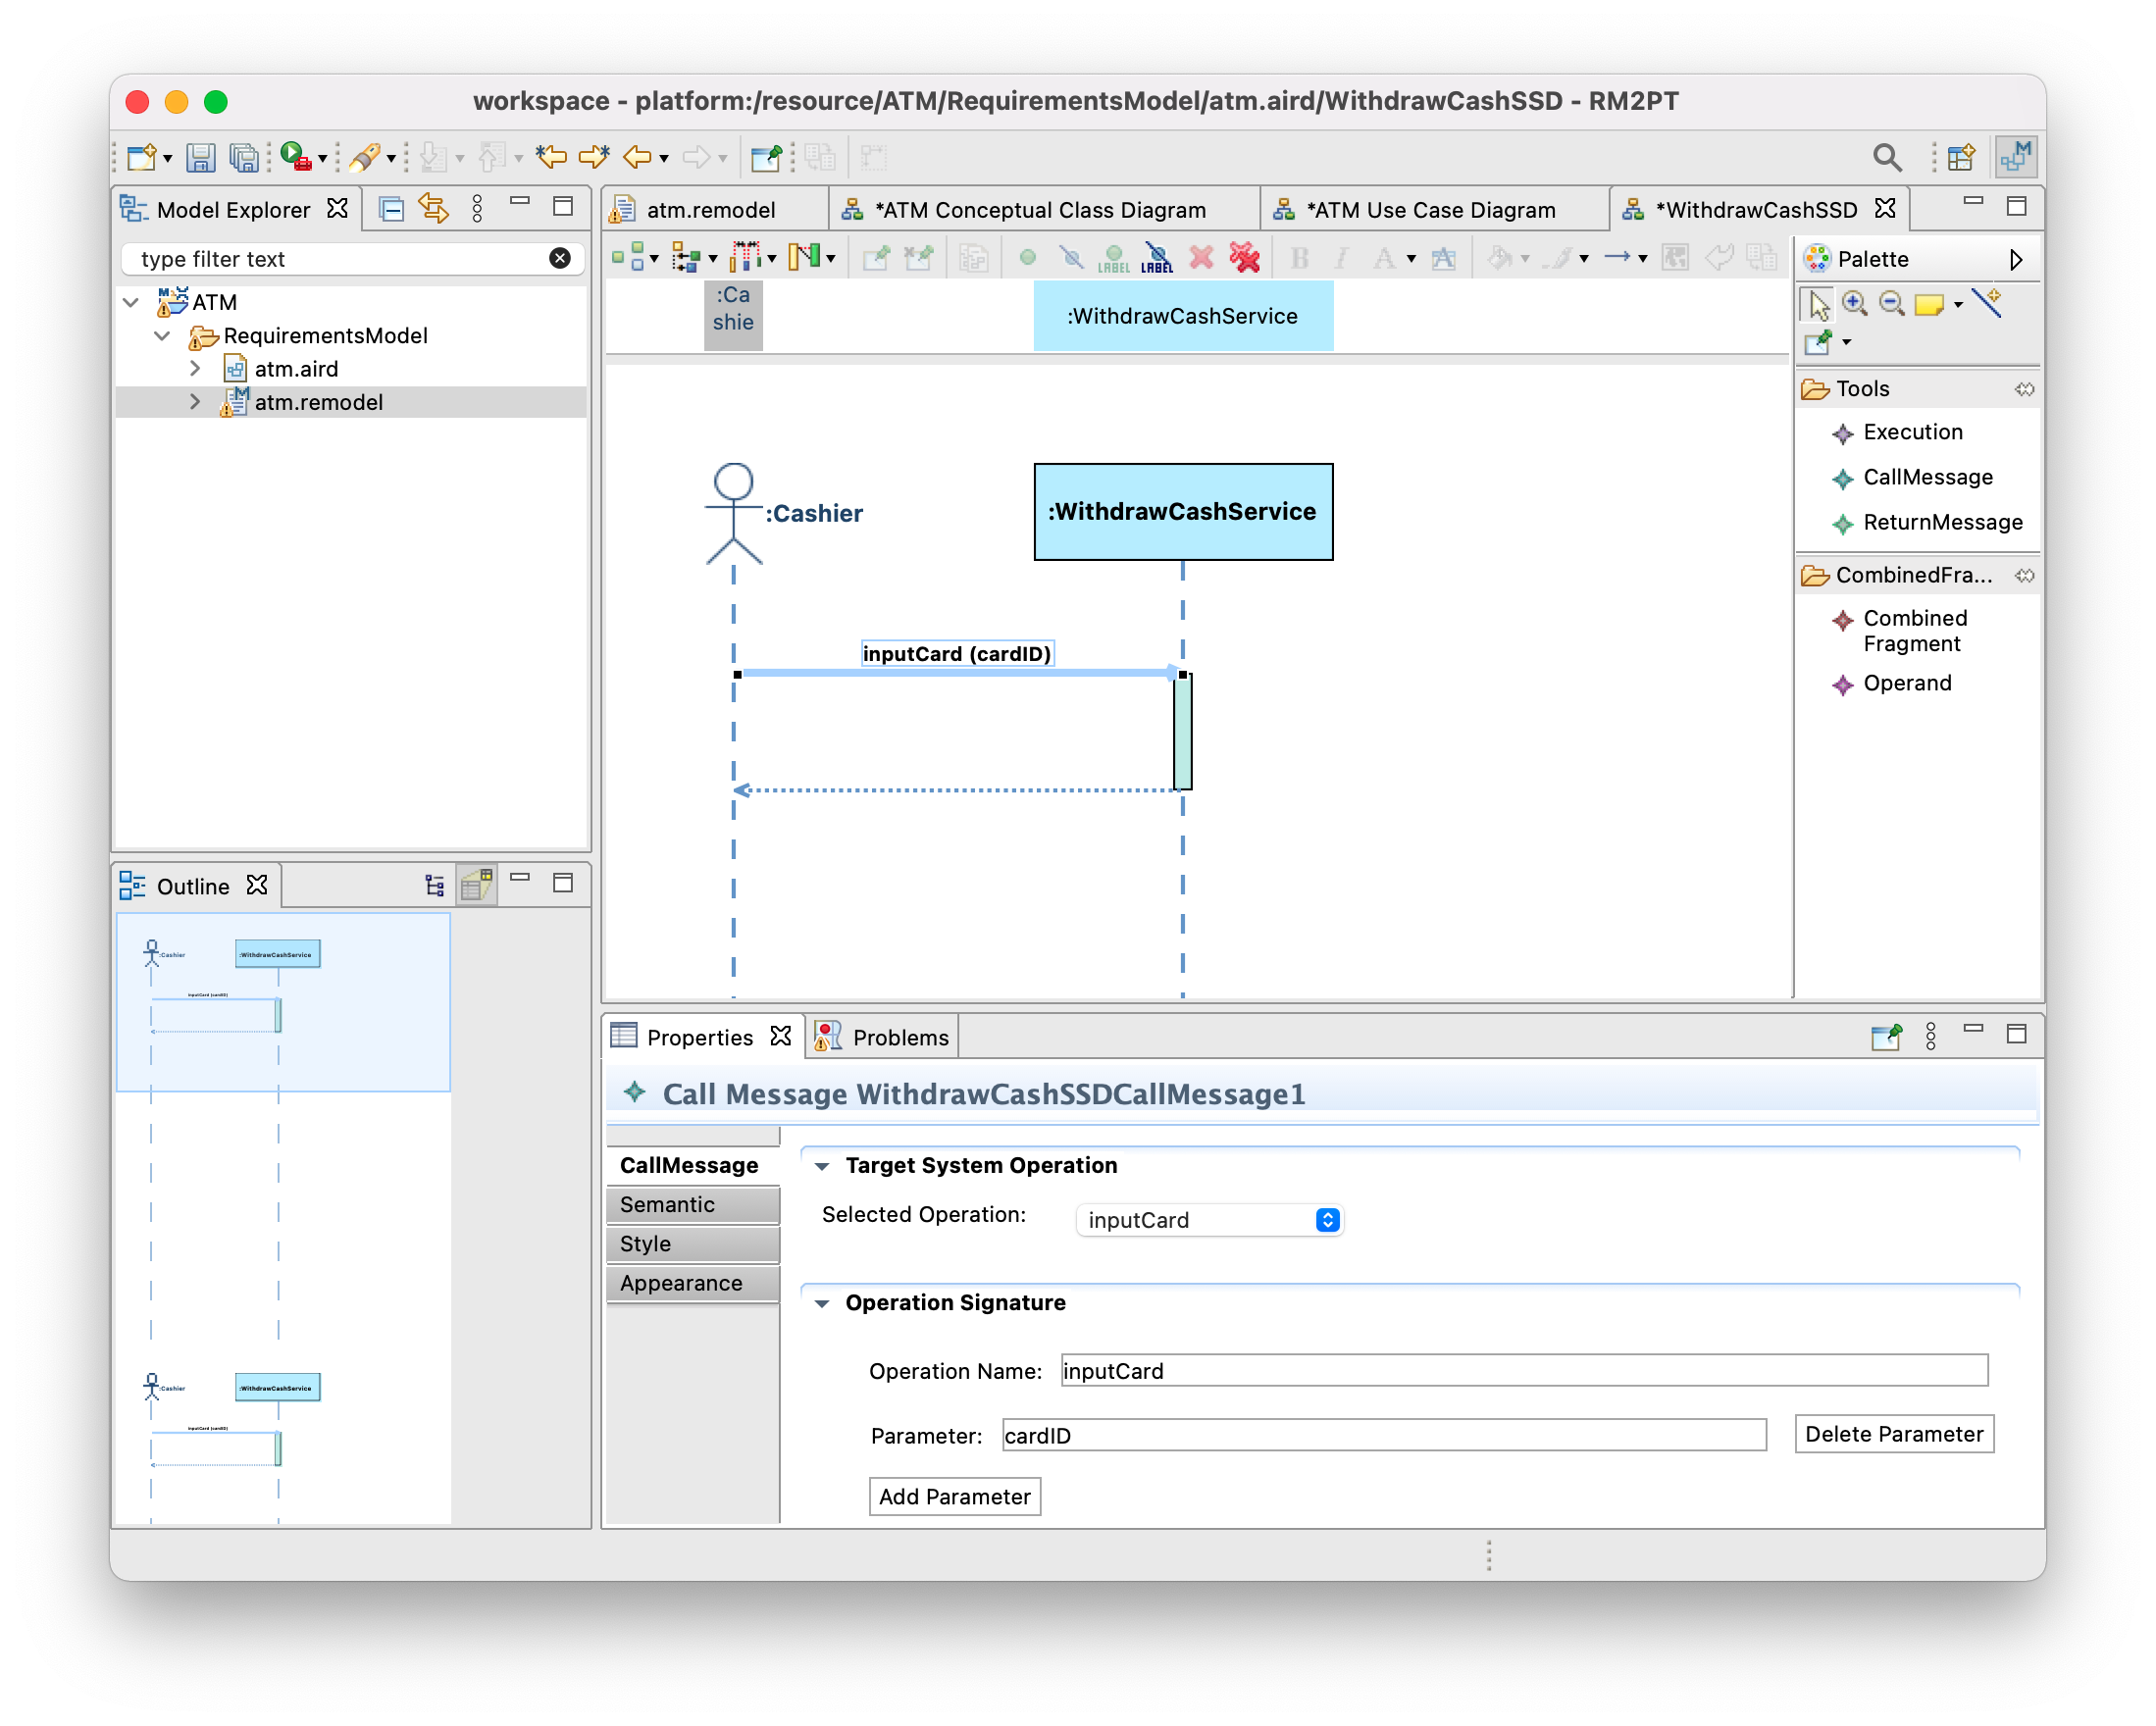
Then create a callmessage inputCard from Cashier to :WithdrawCashService by using Pattle CallMessage
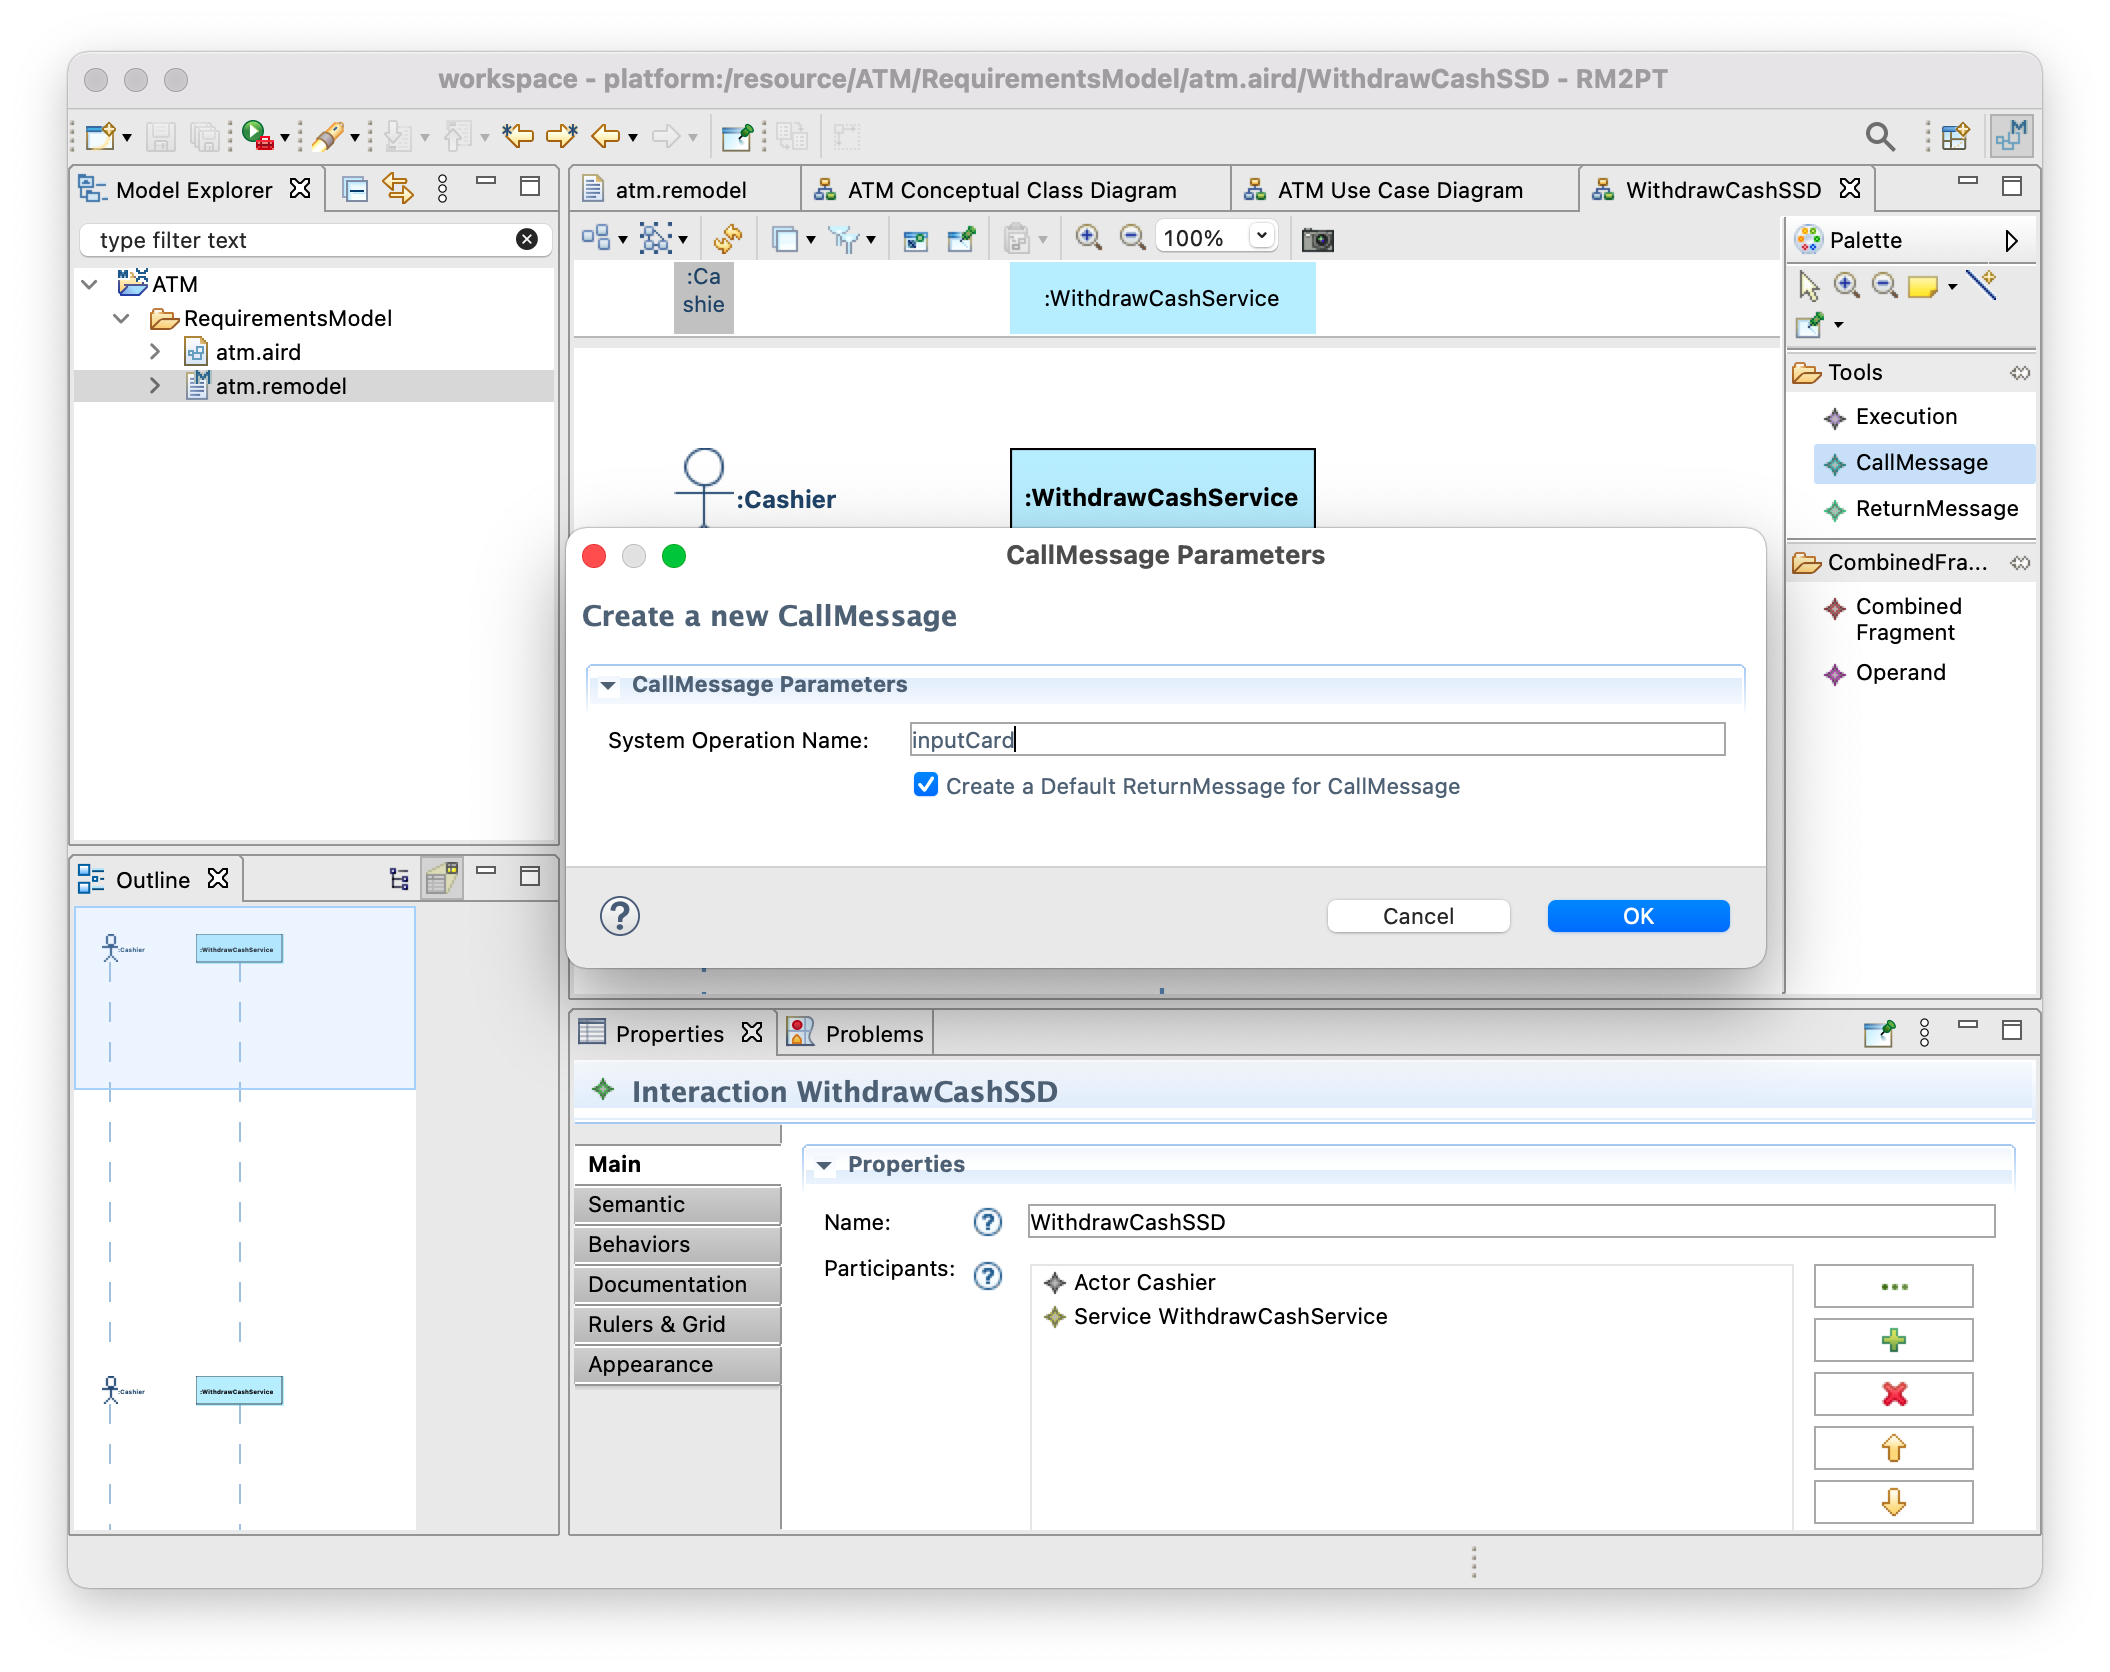
Note that select the option Create a default ReturnMessage for the CallMessage if the system has a directly return message for this call message, the result is shown as follows:
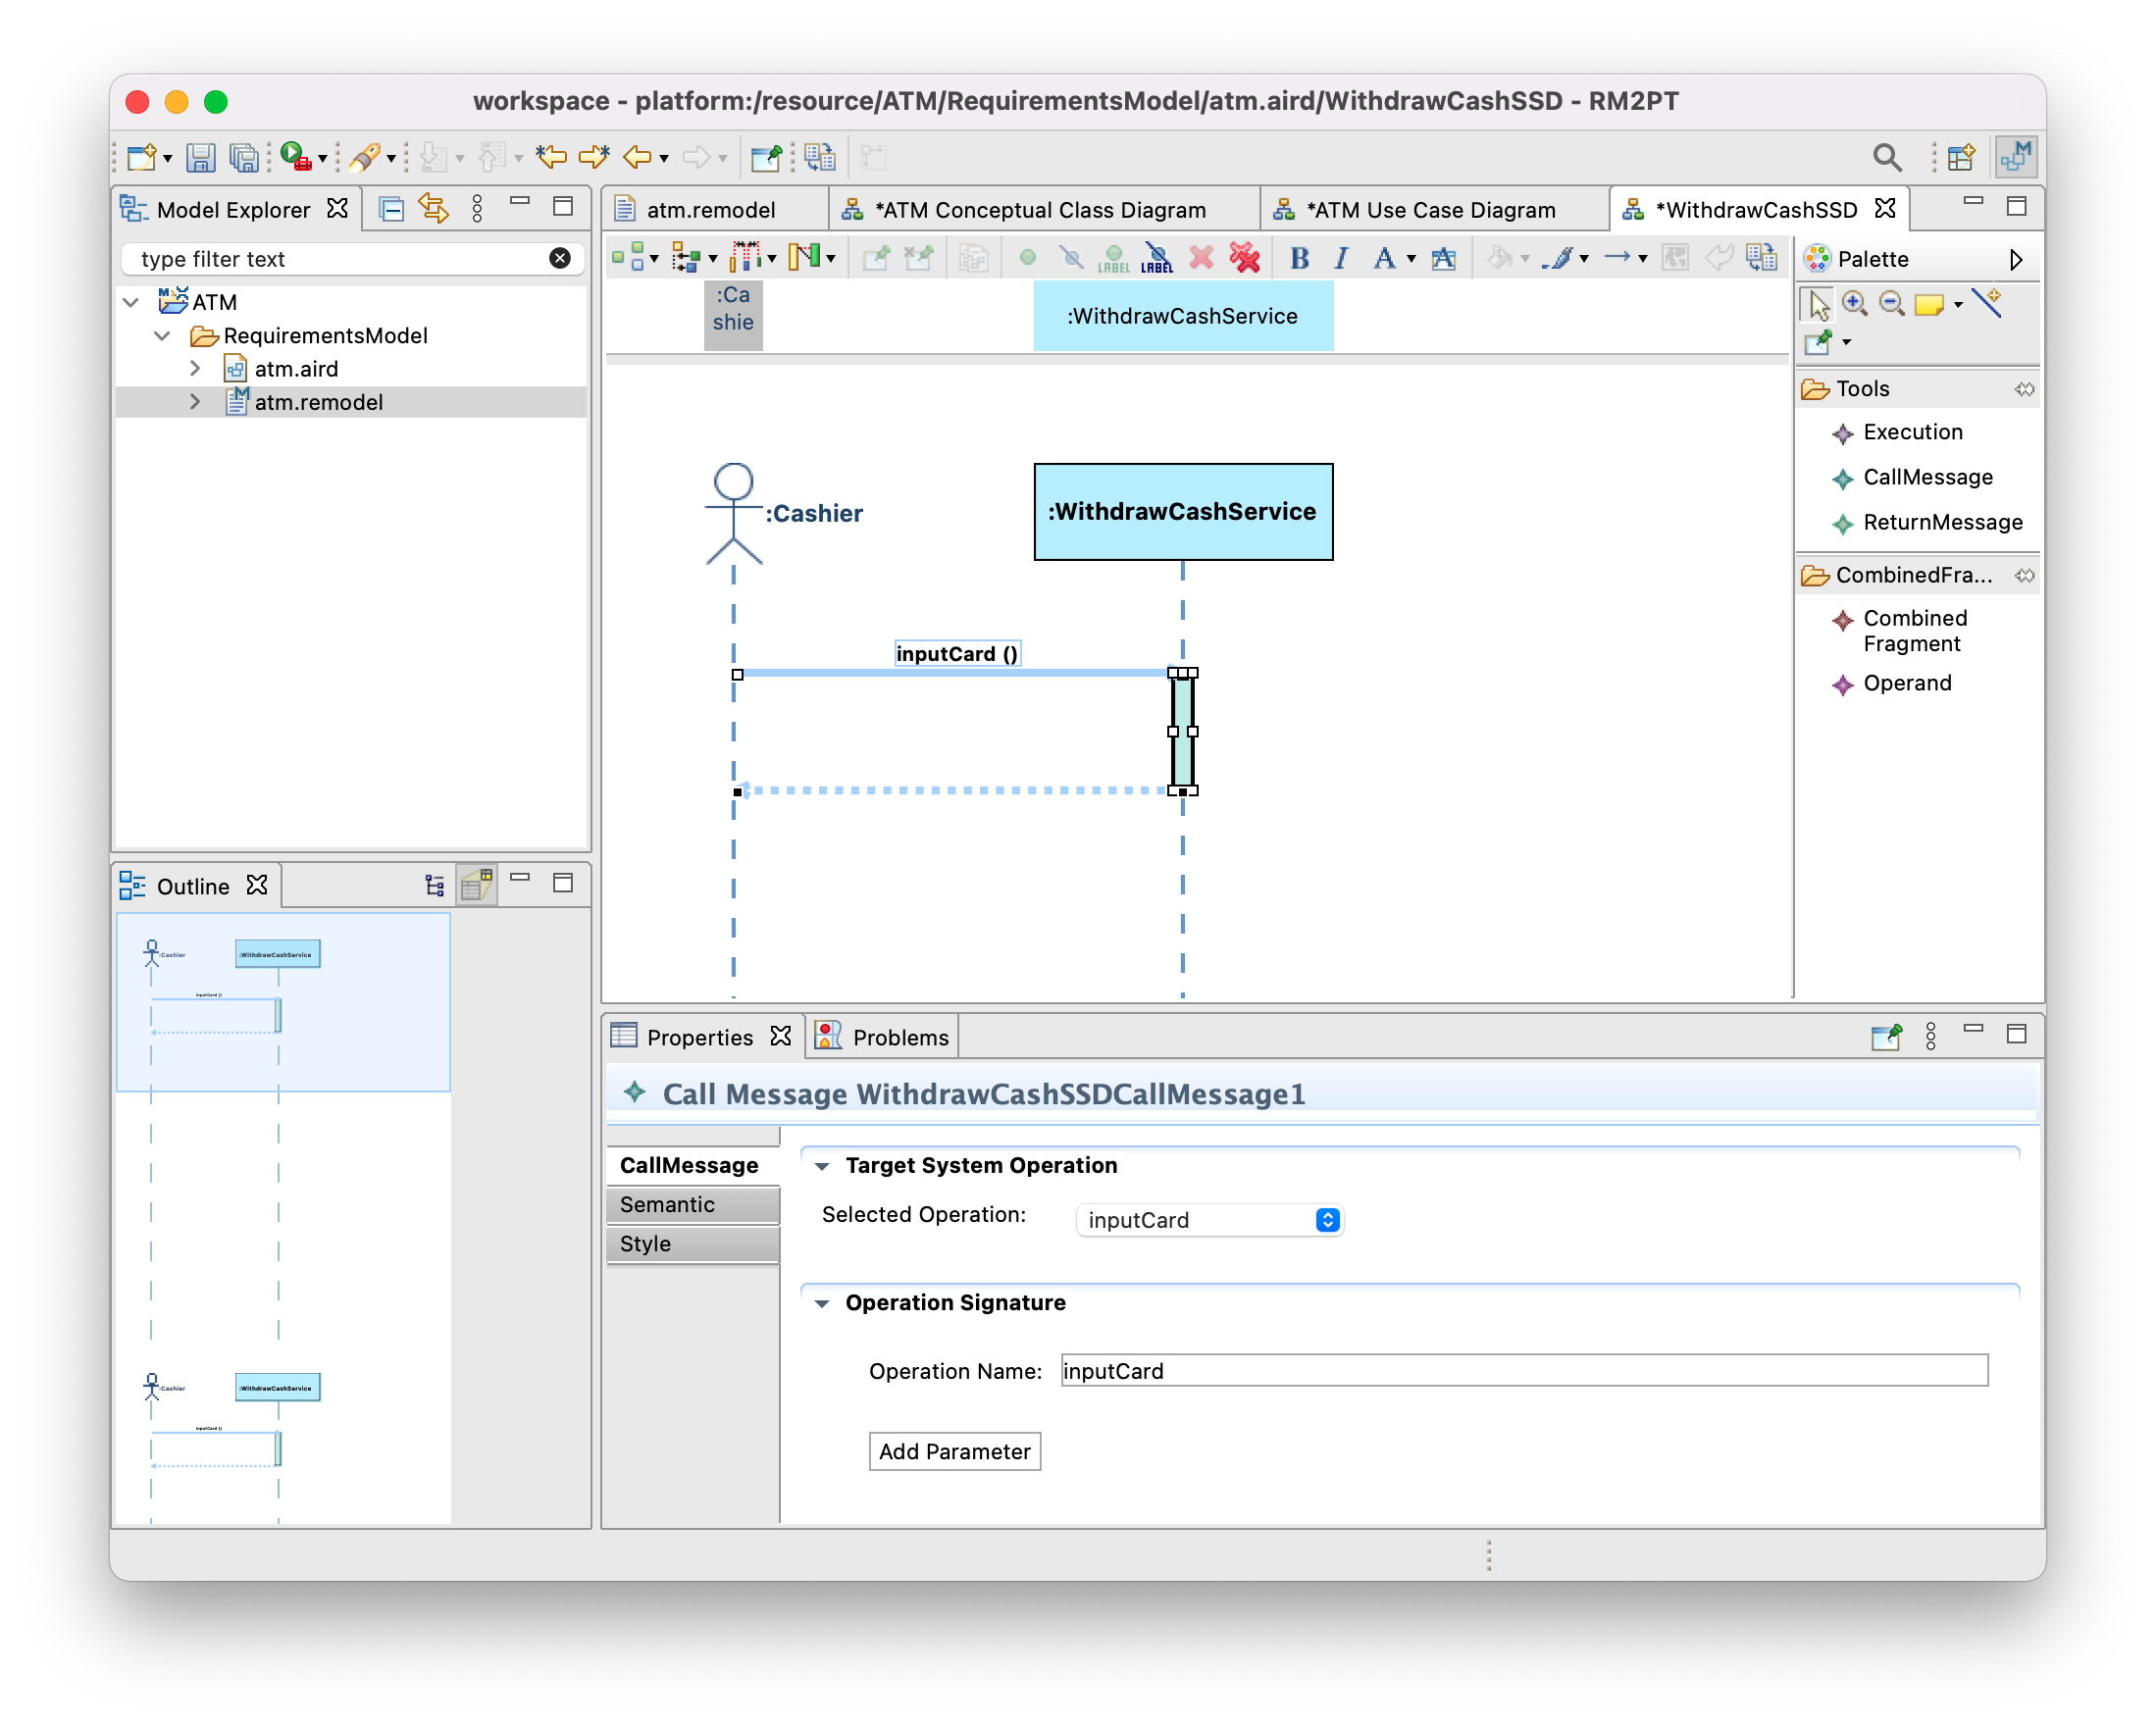
From the Protperties pane on the bottom, you can modify the operation name if any, let’s add parameter cardID for inputCard message
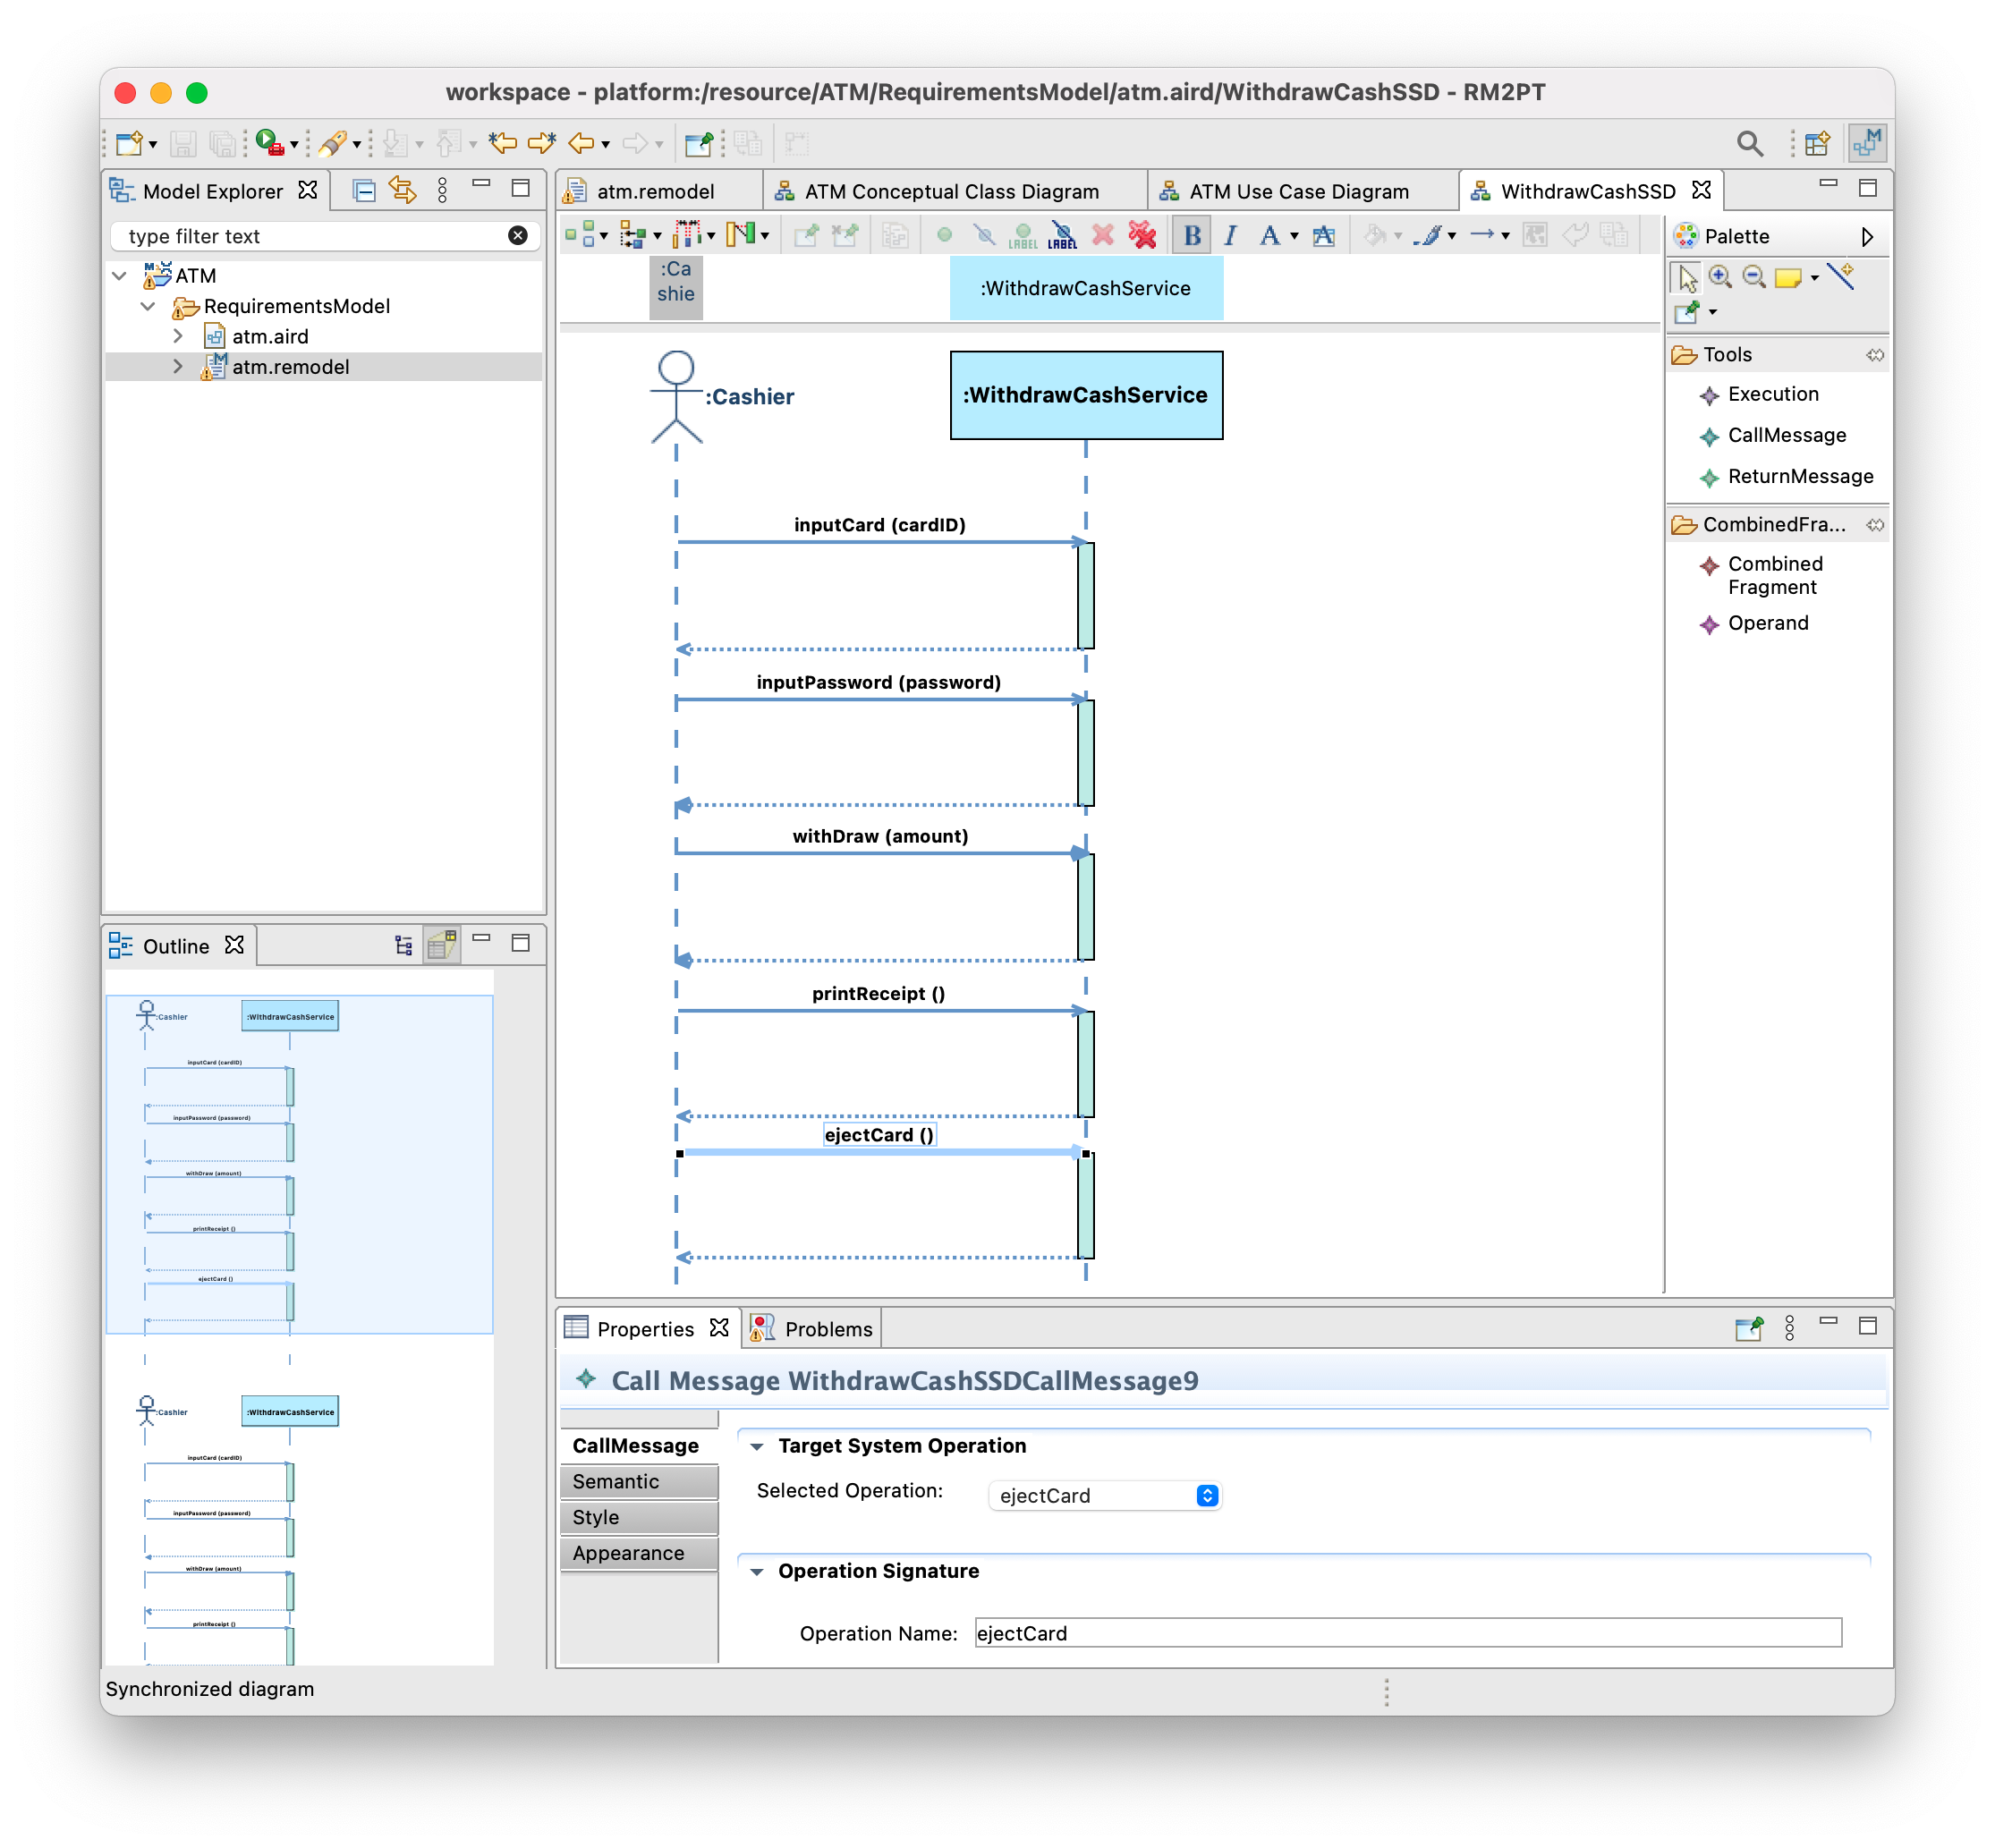
We will add the following 4 messages inputPassword(pasword) withDraw(amount) printReceipt() ejectCard() , then the system sequence diagram for withdrawCash will look like:
Step 3: OCL Contract for System Operation
OCL is object constraint language for UML. Now, we can copy and paste the following contracts into atm.remodel file
	Contract WithdrawCashService::inputCard(cardID :Integer) : Boolean {

		/* definition skeleton */
		definition:
			bc:BankCard = BankCard.allInstance()->any(c:BankCard | c.CardID = cardID)

		/* precondition: skeleton */
		precondition:
			true

		/* postcondition: skeleton */
		postcondition:
			if
				(bc.oclIsUndefined() = false)
			then
				self.CardIDValidated = true and
				self.InputCard = bc and
				result = true
			else
				self.CardIDValidated = false and
				result = false
			endif
	}

	Contract WithdrawCashService::inputPassword(password : Integer) : Boolean {

		/* precondition: skeleton */
		precondition:
			self.CardIDValidated = true and
			self.InputCard.oclIsUndefined() = false

		/* postcondition: skeleton */
		postcondition:
			if
				self.InputCard.Password = password
			then
				self.PasswordValidated = true and
				return = true
			else
				self.PasswordValidated = false and
				return = false
			endif
	}

	Contract WithdrawCashService::printReceipt() : Real {

		/* precondition: skeleton */
		precondition:
			self.CardIDValidated = true and
			self.PasswordValidated = true and
			self.InputCard.oclIsUndefined() = false

		/* postcondition: skeleton */
		postcondition:
			if
				self.IsWithdraw = true
			then
				result = self.WithdrawedNumber
			else
				if
					self.IsDeposit = true
				then
					result = self.DepositedNumber
				else
					result = 0
				endif
			endif
	}

	Contract WithdrawCashService::ejectCard() : Boolean {

		/* precondition: skeleton */
		precondition:
			self.PasswordValidated = true and
			self.CardIDValidated = true and
			self.InputCard.oclIsUndefined() = false

		/* postcondition: skeleton */
		postcondition:
			self.InputCard = null and
			self.PasswordValidated = false and
			self.CardIDValidated = false and
			self.IsWithdraw = false and
			self.IsDeposit = false and
			self.WithdrawedNumber = 0 and
			self.DepositedNumber = 0 and
			result = true
	}

	Contract WithdrawCashService::withDraw(amount : Integer) : Boolean {

		/* precondition: skeleton */
		precondition:
			self.PasswordValidated = true and
			self.CardIDValidated = true and
			self.InputCard.oclIsUndefined() = false and
			self.InputCard.Balance >= amount

		/* postcondition: skeleton */
		postcondition:
			self.InputCard.Balance = self.InputCard.Balance@pre - amount and
			self.WithdrawedNumber = amount and
			self.IsWithdraw = true and
			result = true
	}
Note that the contract can only be placed inside of UseCaseMode after Service. Specifying the OCL contract is the most diffcult part of requirements modeling. the tutorial of OCL can be referred here (not ready). While specifying the contract, you will find the concepts (object/class) and related characteristic (attribute) on the target domain, then you can model the target domain in the next step.
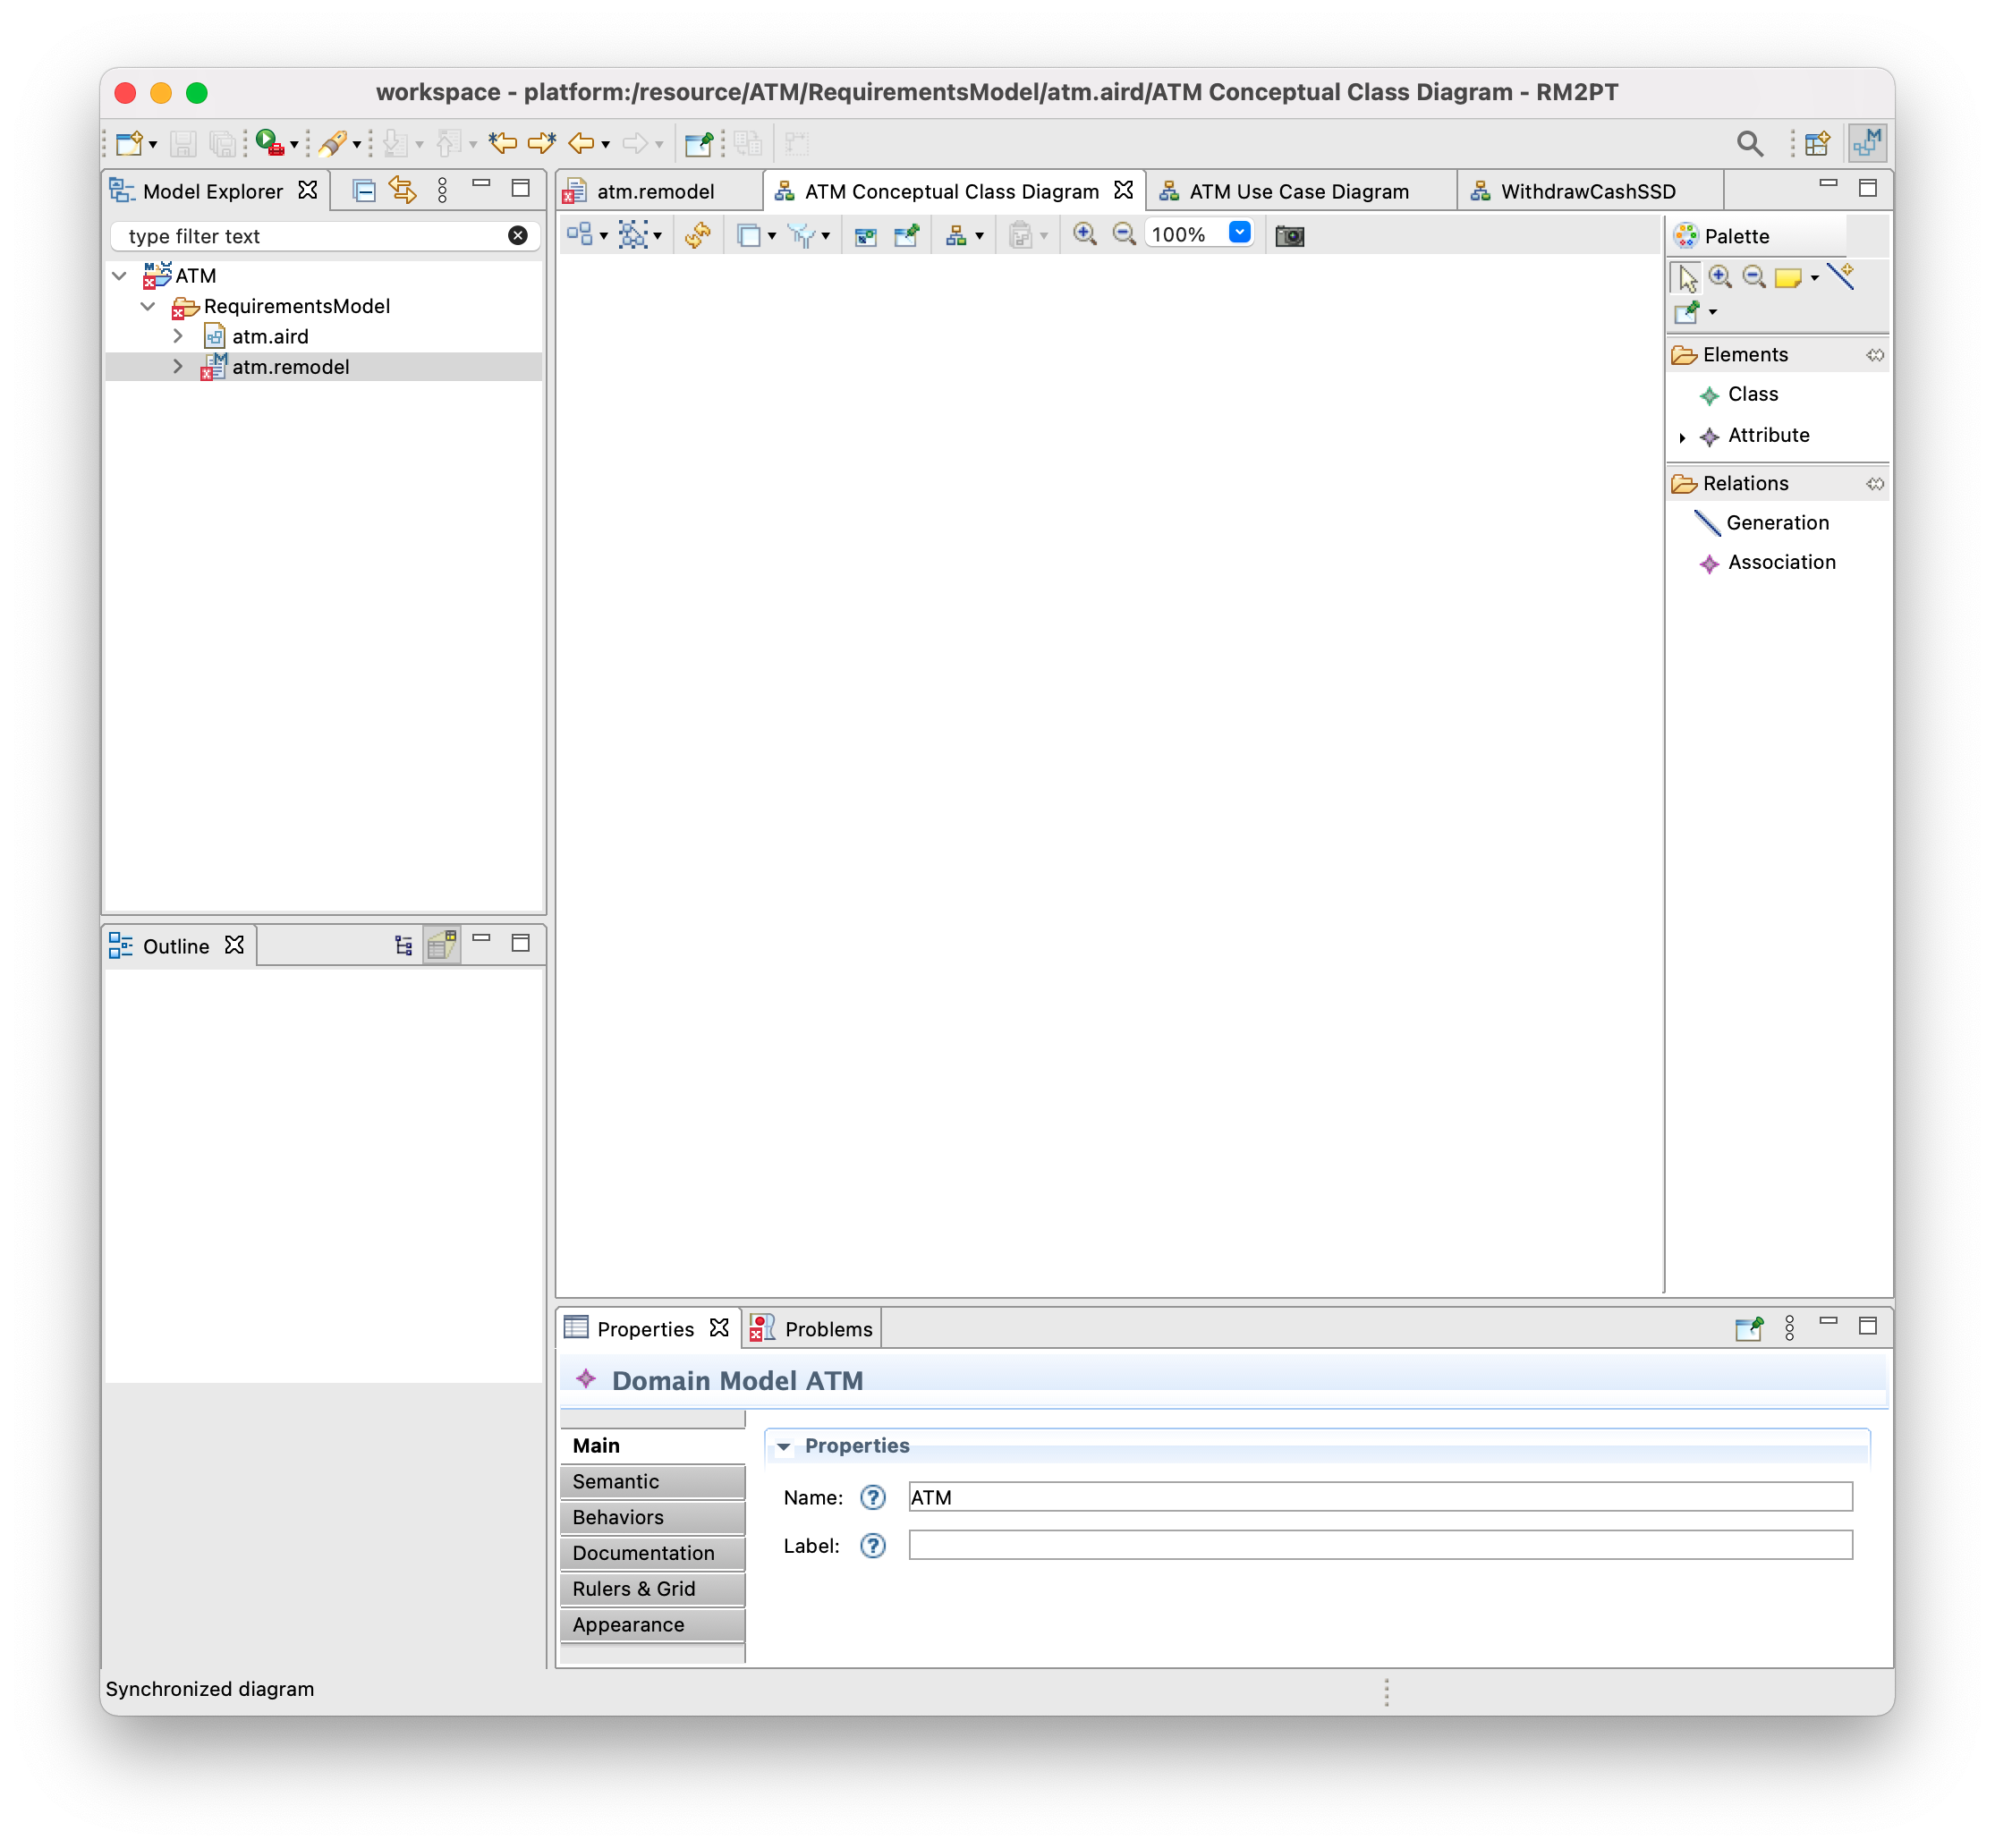
Step 4: Conceptual Class Diagram for Domain Model
Switch to the ATM Conceputal Class Diagram Tab to show the empty domain model.
Create the class BandCard andUser
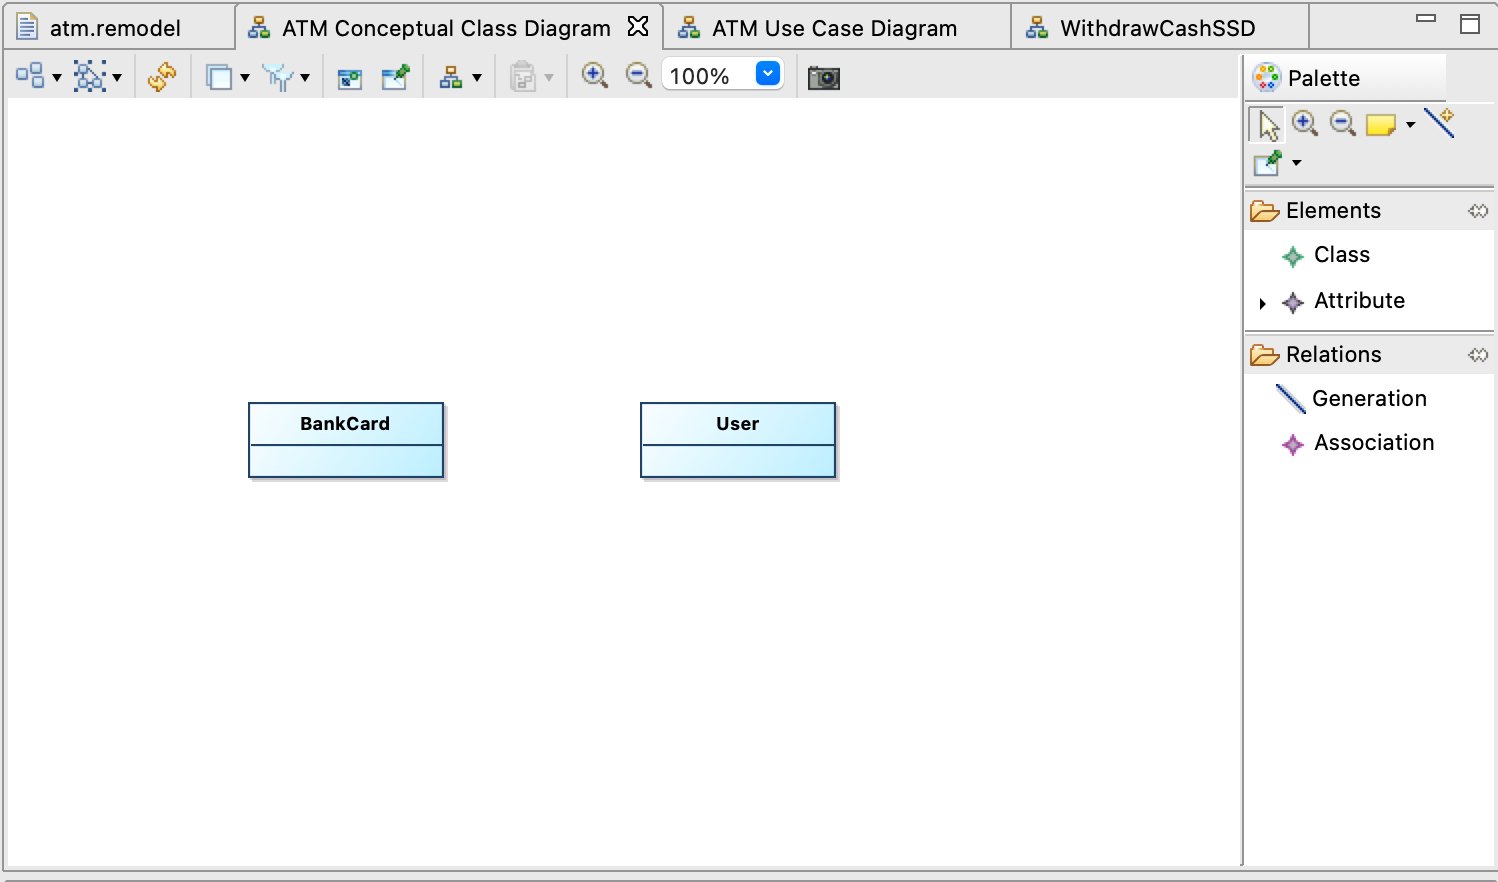
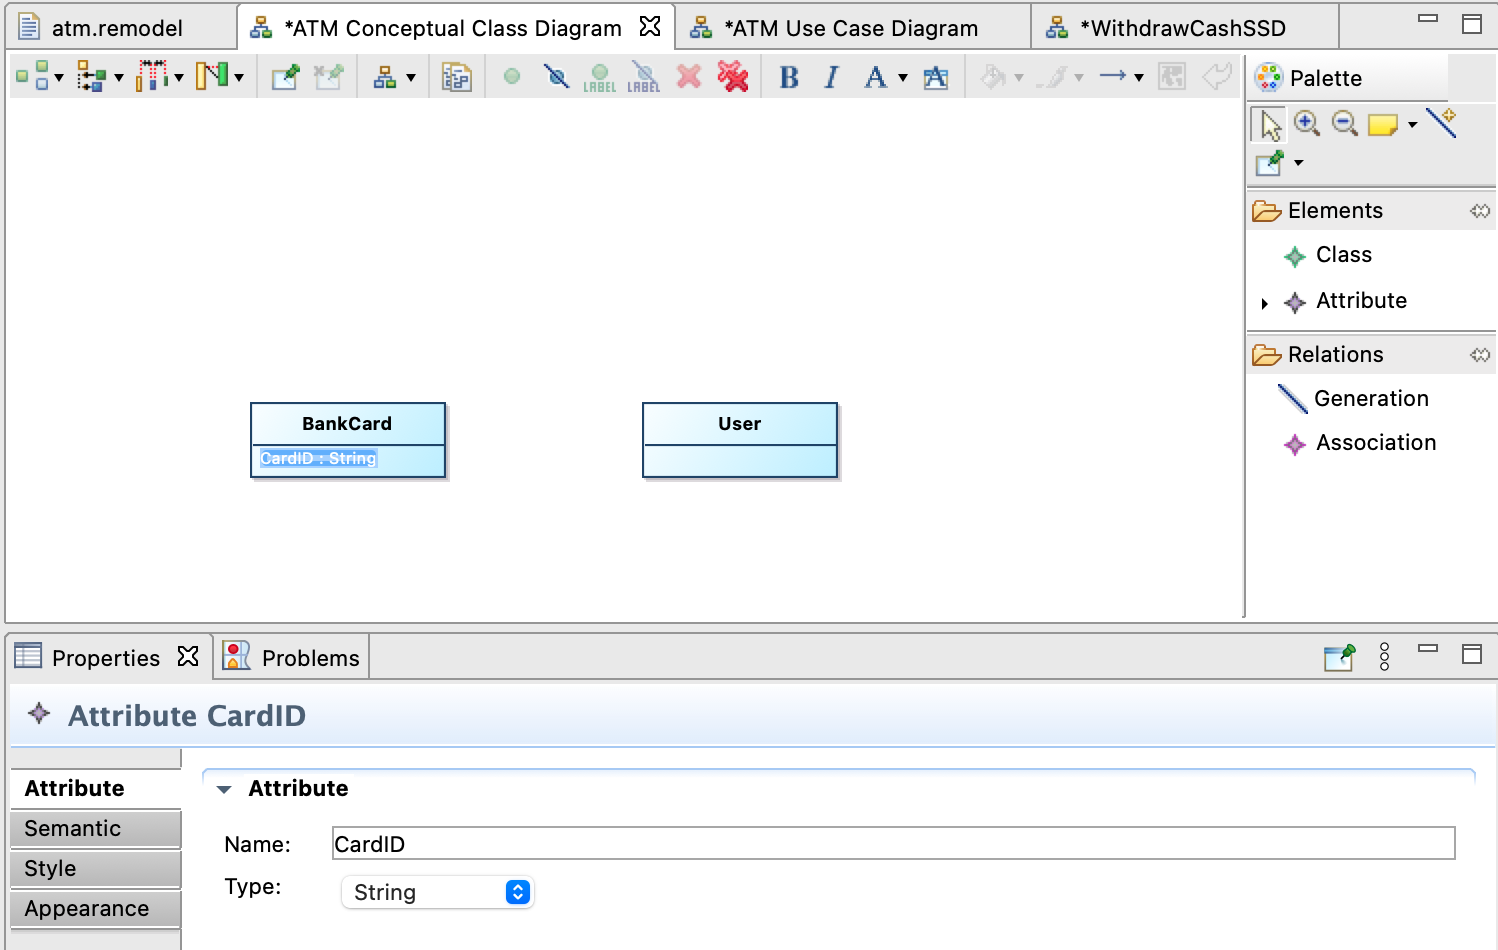
add the attributes CardID to BankCard , the type of attribute can be changed through the panel as follows:
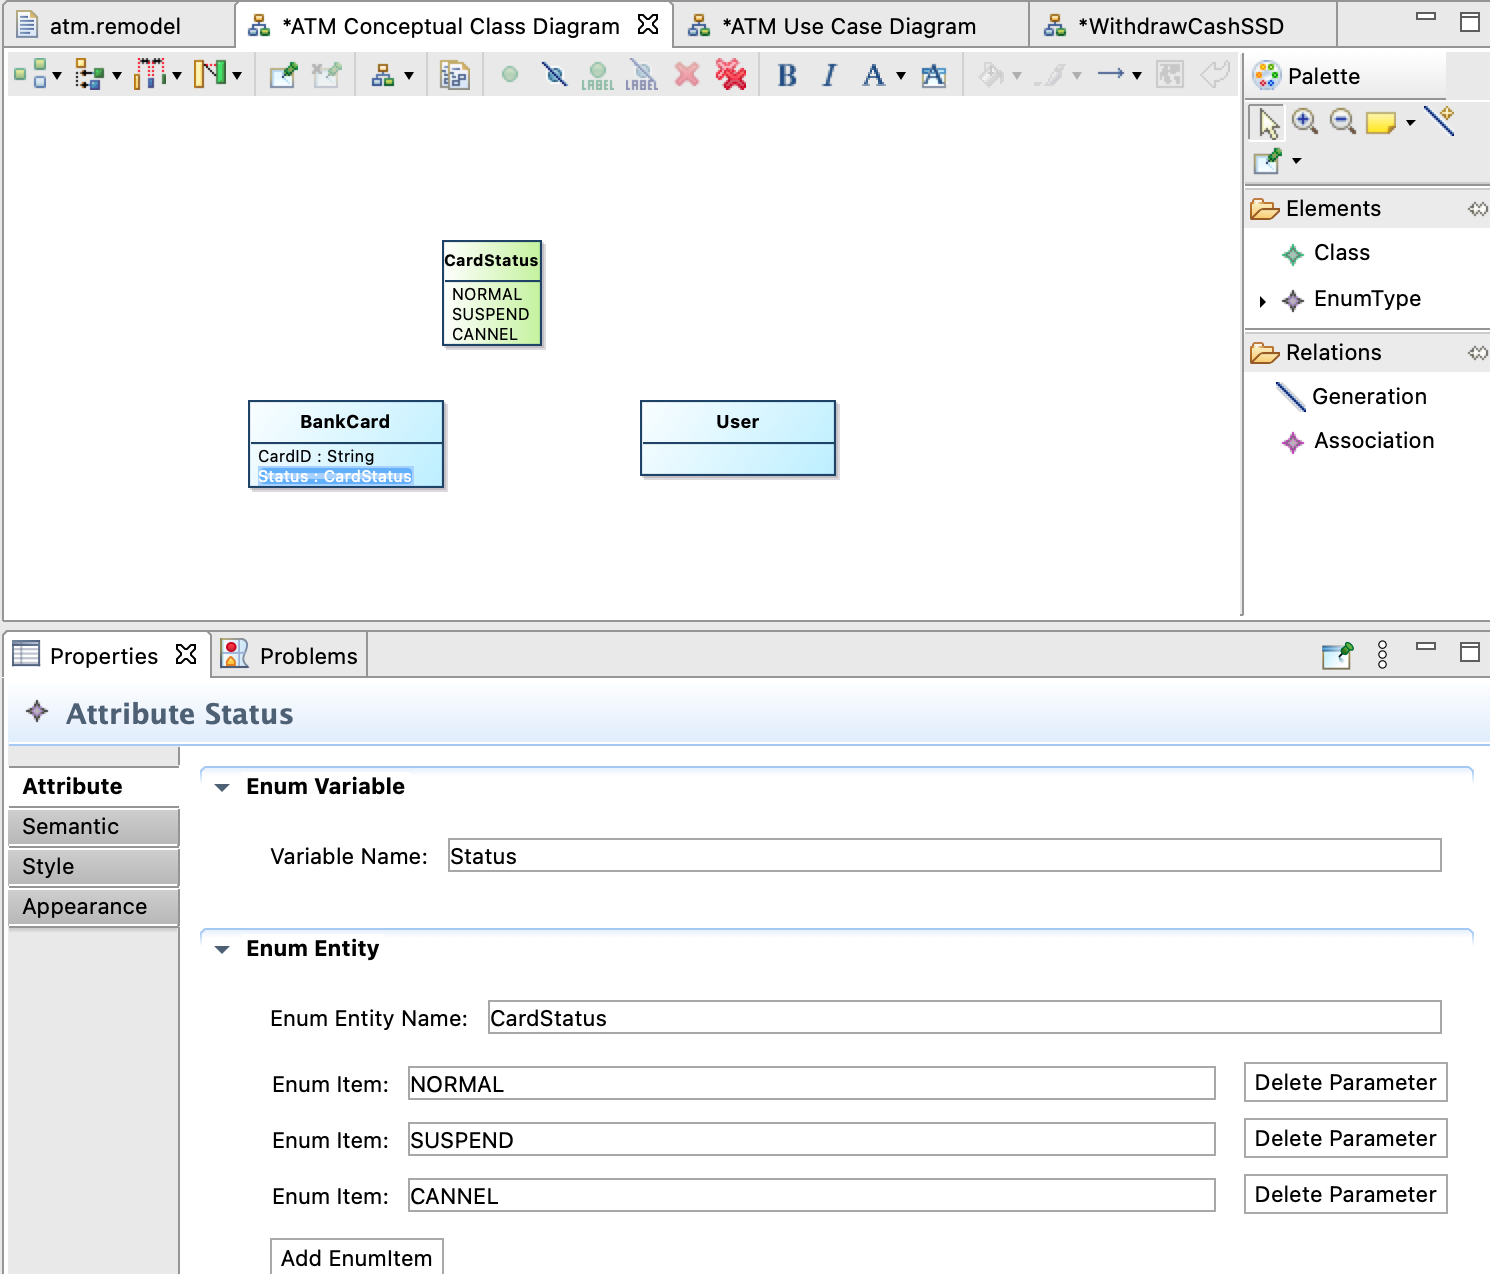
Then add the attribute CardStatus as EnumType , Note that Enum Variable Name Status, Enum Entity Name , and CardStatus Enum Item NORMAL/SUSPEND/CANNEL. All EnumItems must be the captial letter.
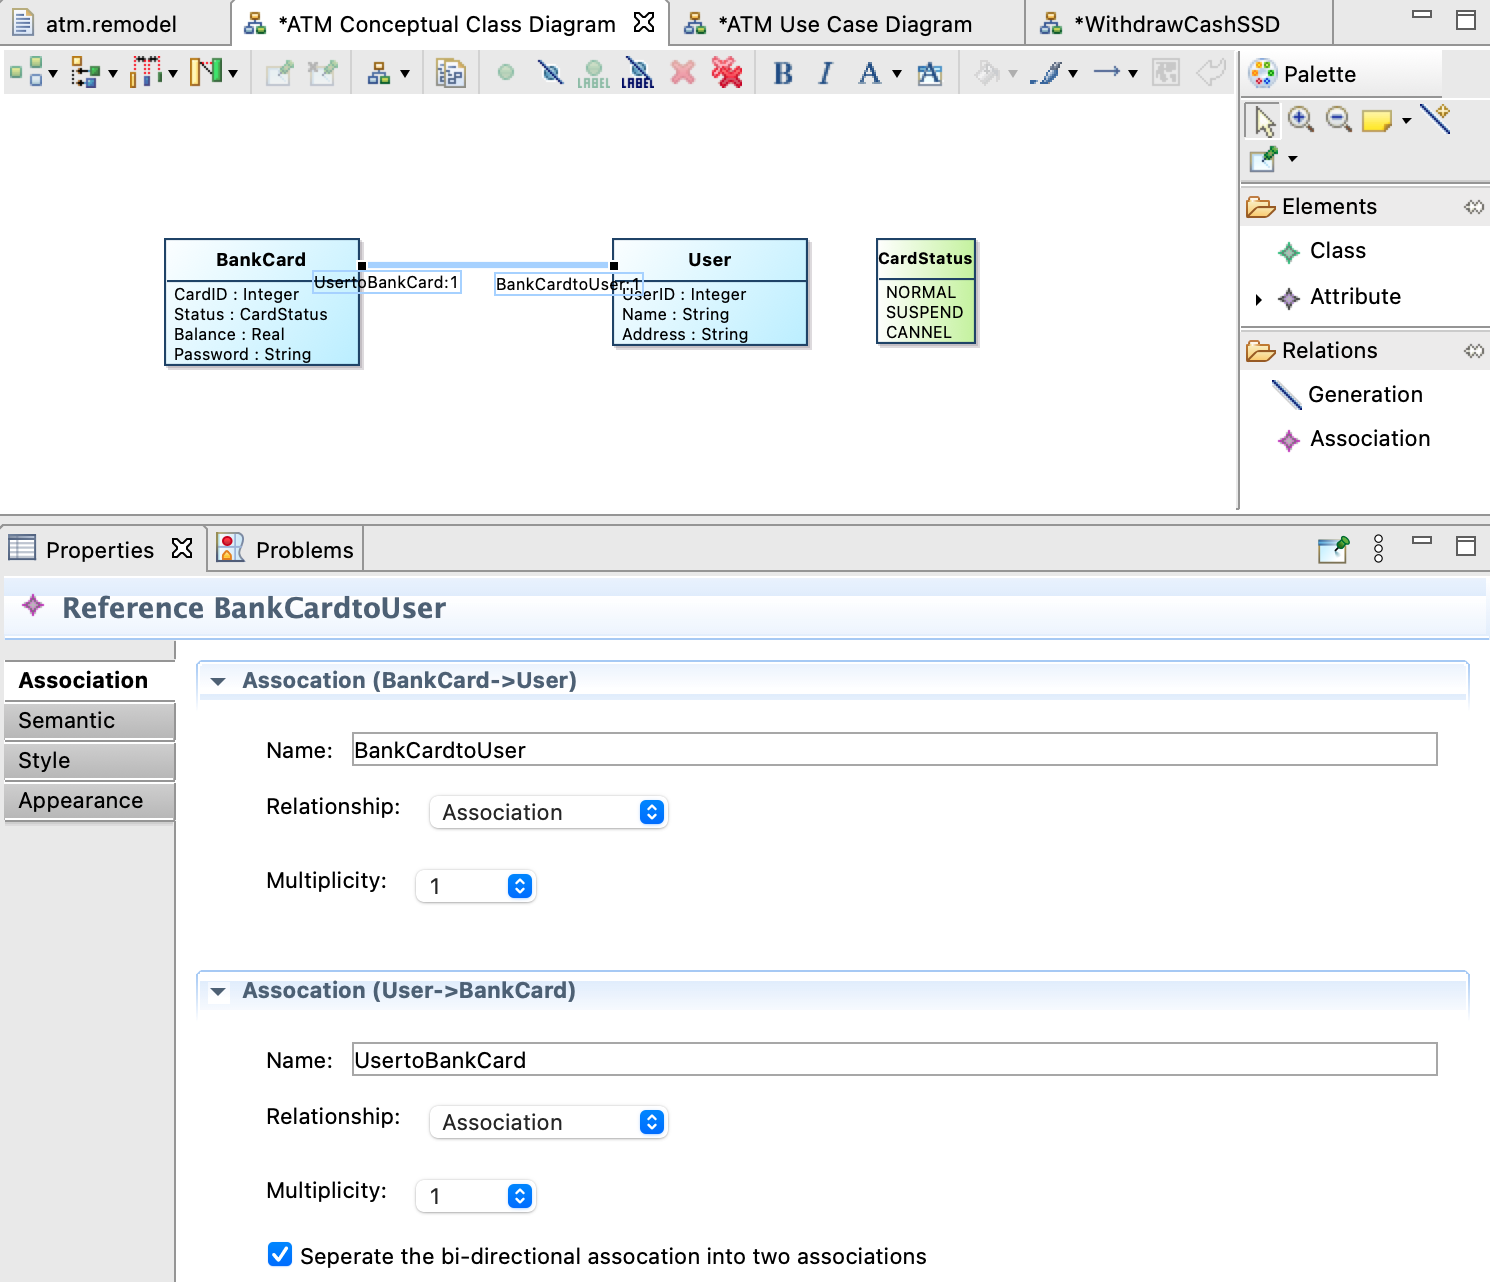
Then add the attributes such as Balance and Password to BankCard and UserID, Name, Address to the class User.

Finally, we add the assocations between the classes of BankCard and User

Note that the assocation will merge to one if the classes has bi-directional assocations, you can seperate the bi-directional assocations into two associations by click ‘Seperate the bi-directional assocaition` into associations.
Now the first-round requirements modeling is finished, you can generate the prototype from this model.